Introducing Enhanced Review Monitoring
As of November 2022, all clients on our Premium plan will enjoy new and improved review monitoring and reputation management. Features include:

- Review monitoring from a huge pool of review sites. All reviews will be pulled into your dashboard in a single feed for a quick overview.
- Negative review alerts via email or text. When a review comes in with 2 stars or fewer, you can receive a notification immediately, so you can handle the situation right away.
- Automatically share reviews on social media. After a simple one-time setup, you just watch the magic happen.
- Website widget that automatically pulls in new, positive reviews. Just let us know if you want this on your site, and we’ll take care of the rest!
- Easy-to-read reports showing review performance over time. Reports can be set up to be emailed to you on a regular basis, or viewed from within the Reviews dashboard at any time.
YOUR REVIEWS DASHBOARD
Dashboard Tour
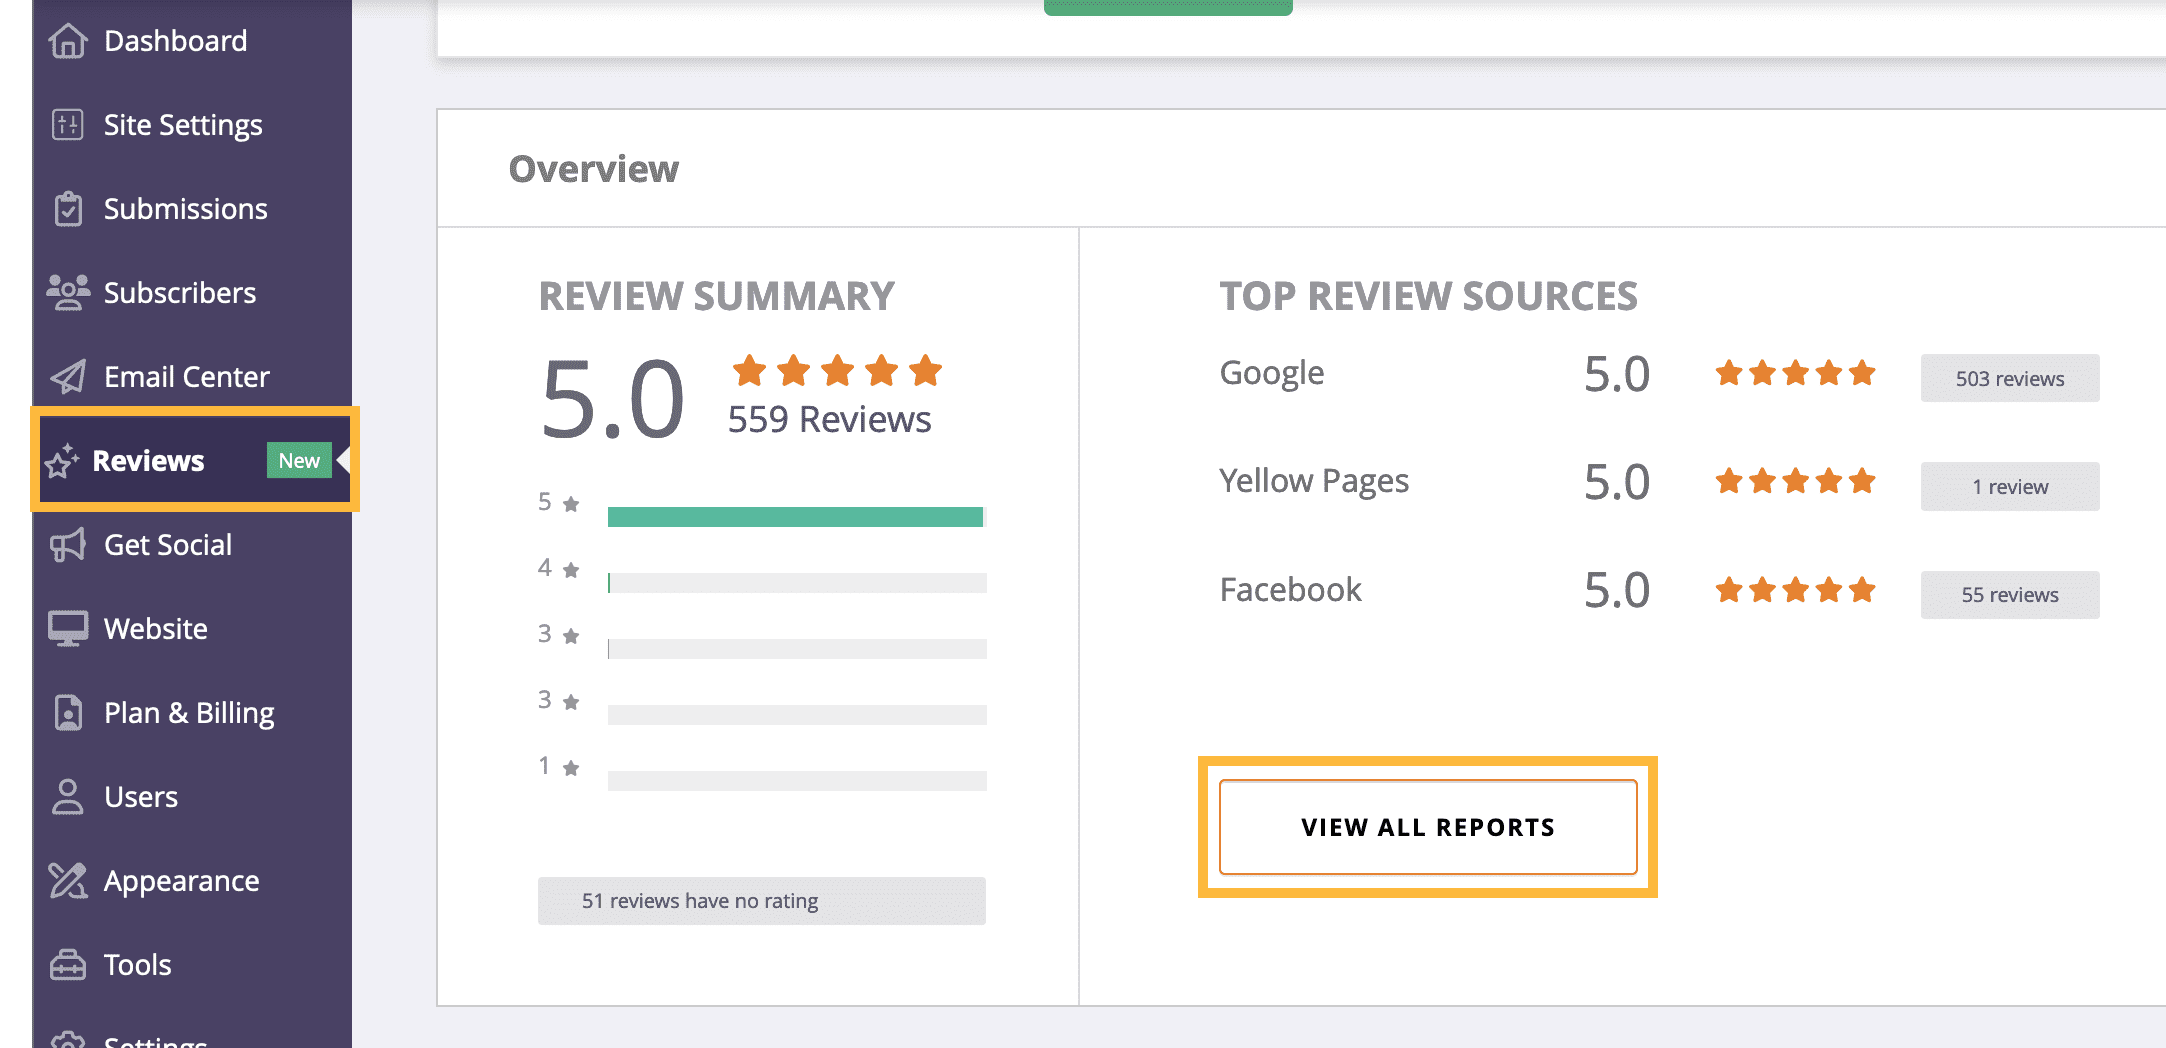
To monitor your reviews in your dashboard, click ‘Reviews’ in the left hand column. From here, you can find the full Reviews Dashboard by clicking ‘View All Reports’.
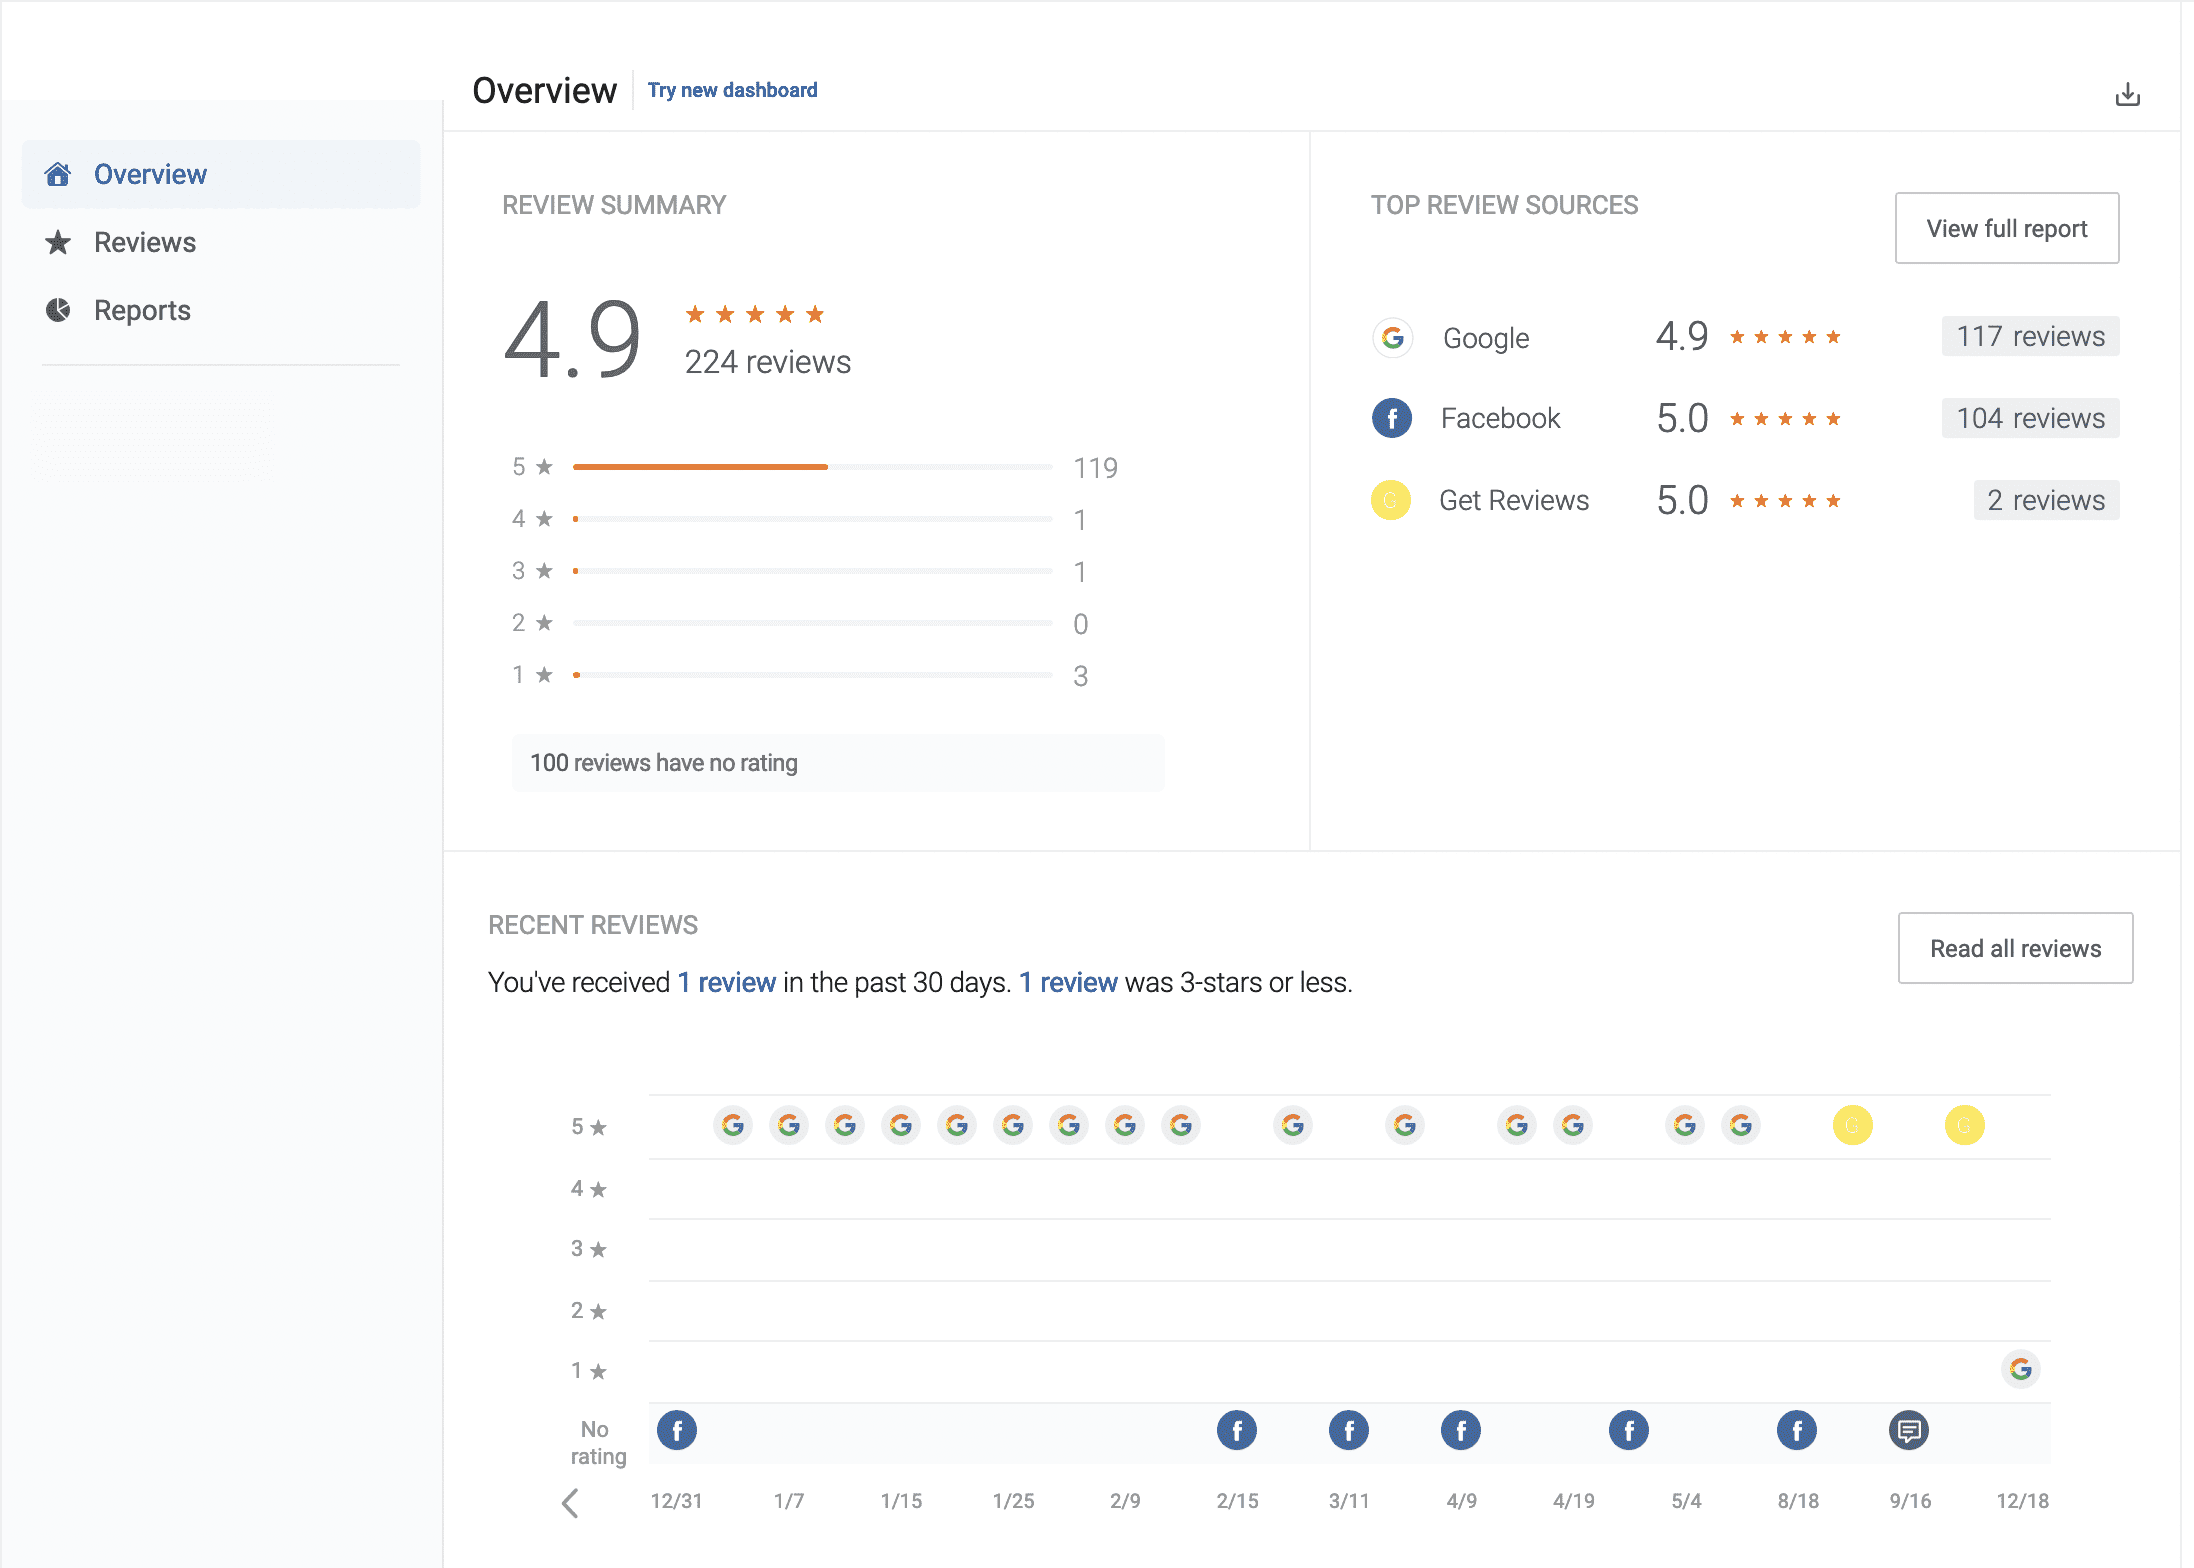
The overview section of your Reviews Dashboard shows you much of the same stats that you saw in your Website Dashboard. Click into any of the graphs to view a more detailed report.
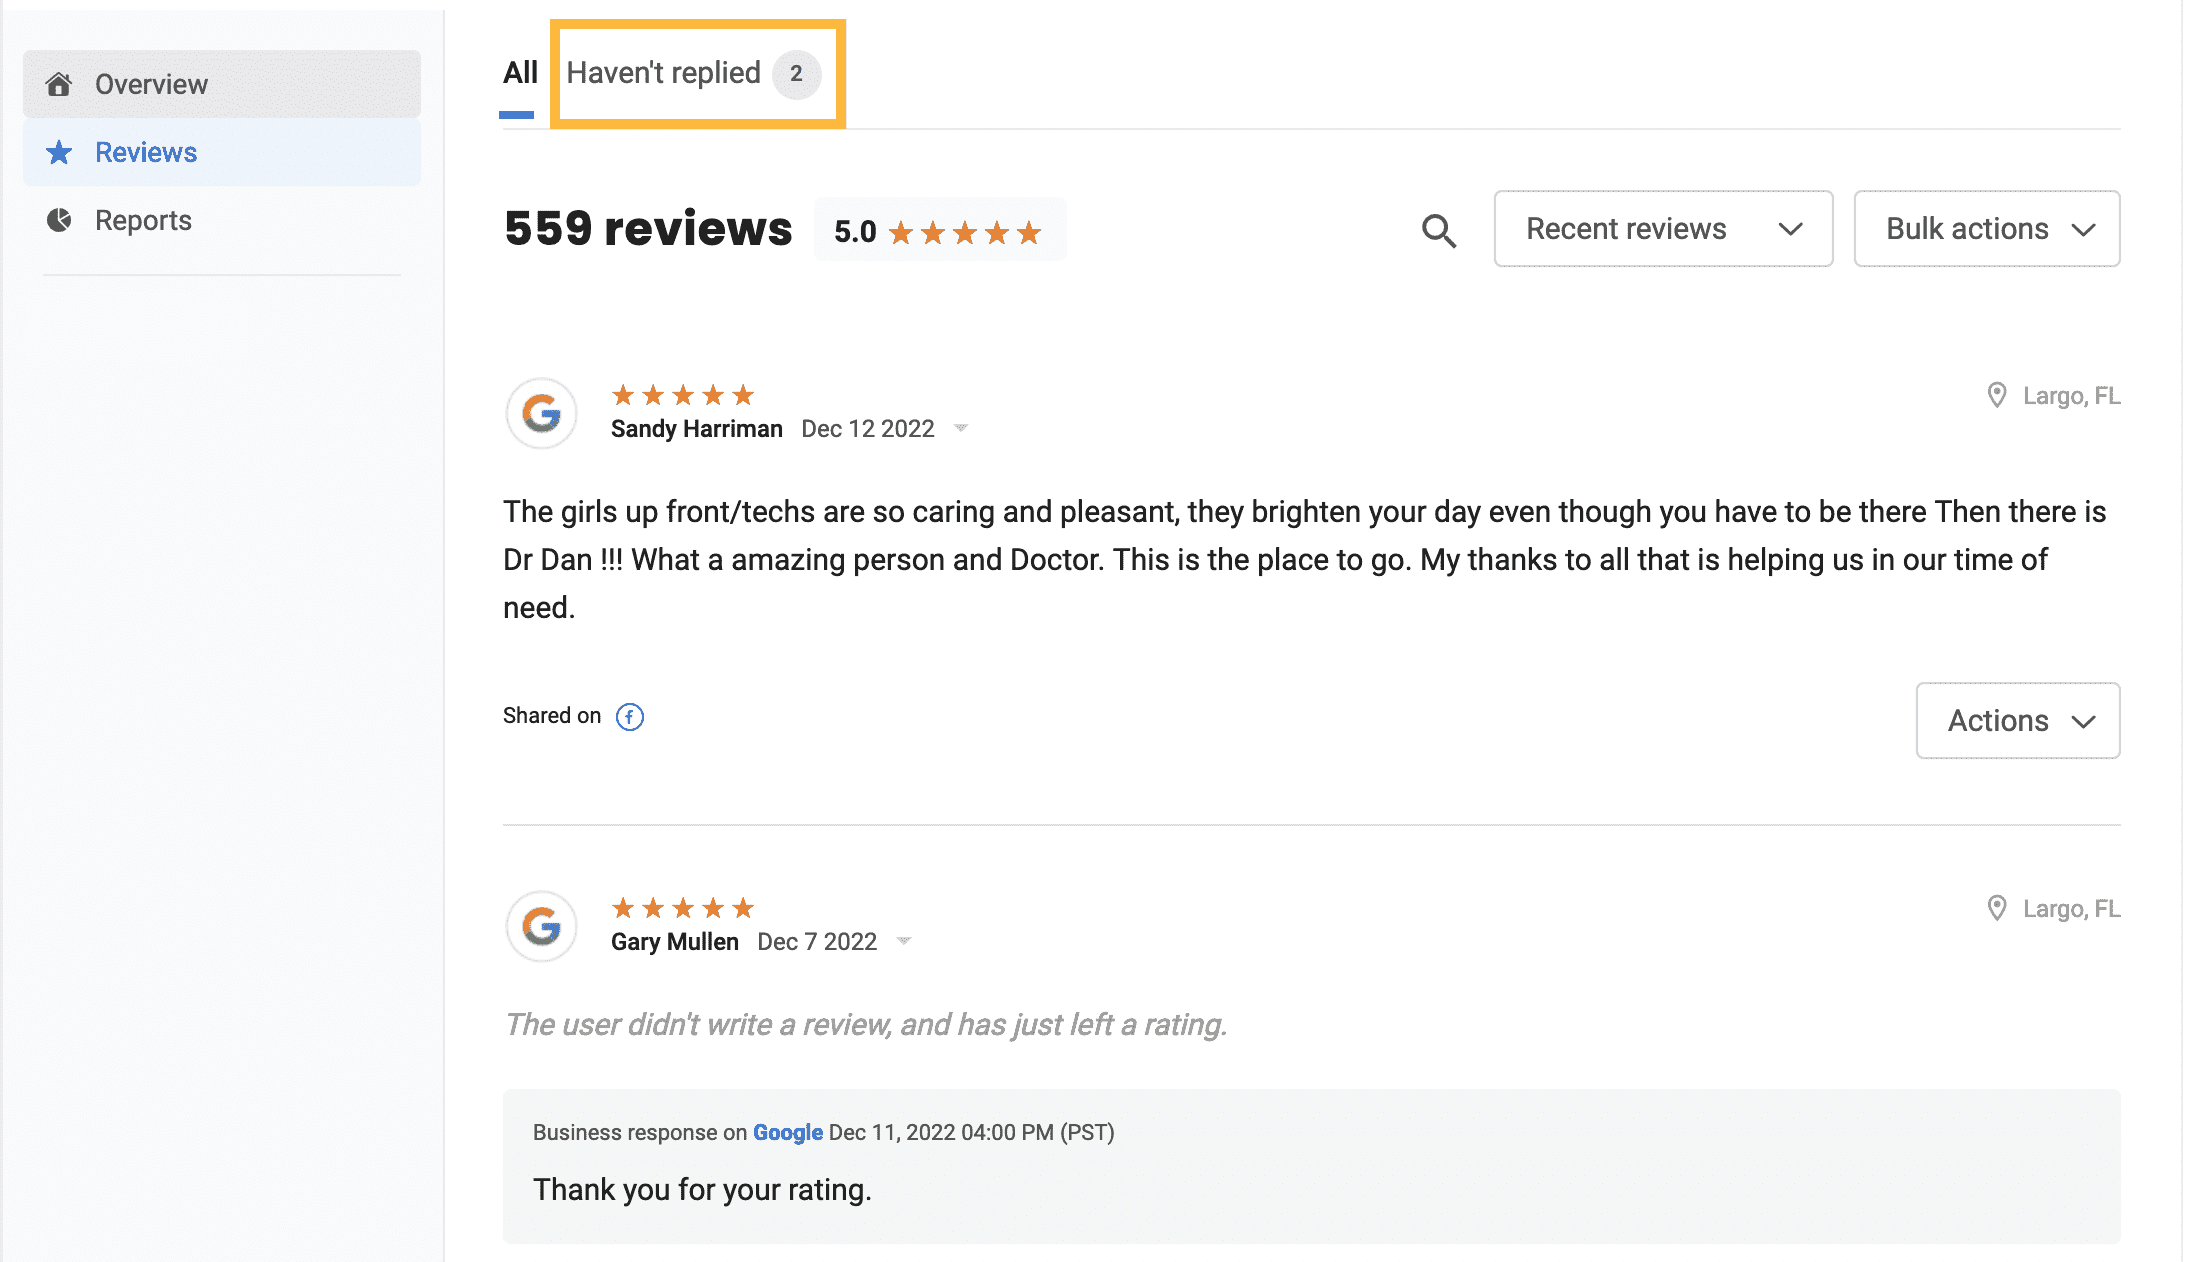
Click ‘Reviews’ in the left hand menu to see a feed of all your incoming reviews, and your business responses. If you’ve connected your Reviews account to your social media profiles, you can use the ‘Actions’ button under any review to share it on your social sites. You also have the option to set up auto-sharing so that incoming positive reviews will post directly to social media without you needing to lift a finger! Contact your Digital Marketing Specialist to have auto-sharing activated.
Notice in the top of your reviews feed, there’s a tab where you can easily find reviews that you haven’t replied to yet.
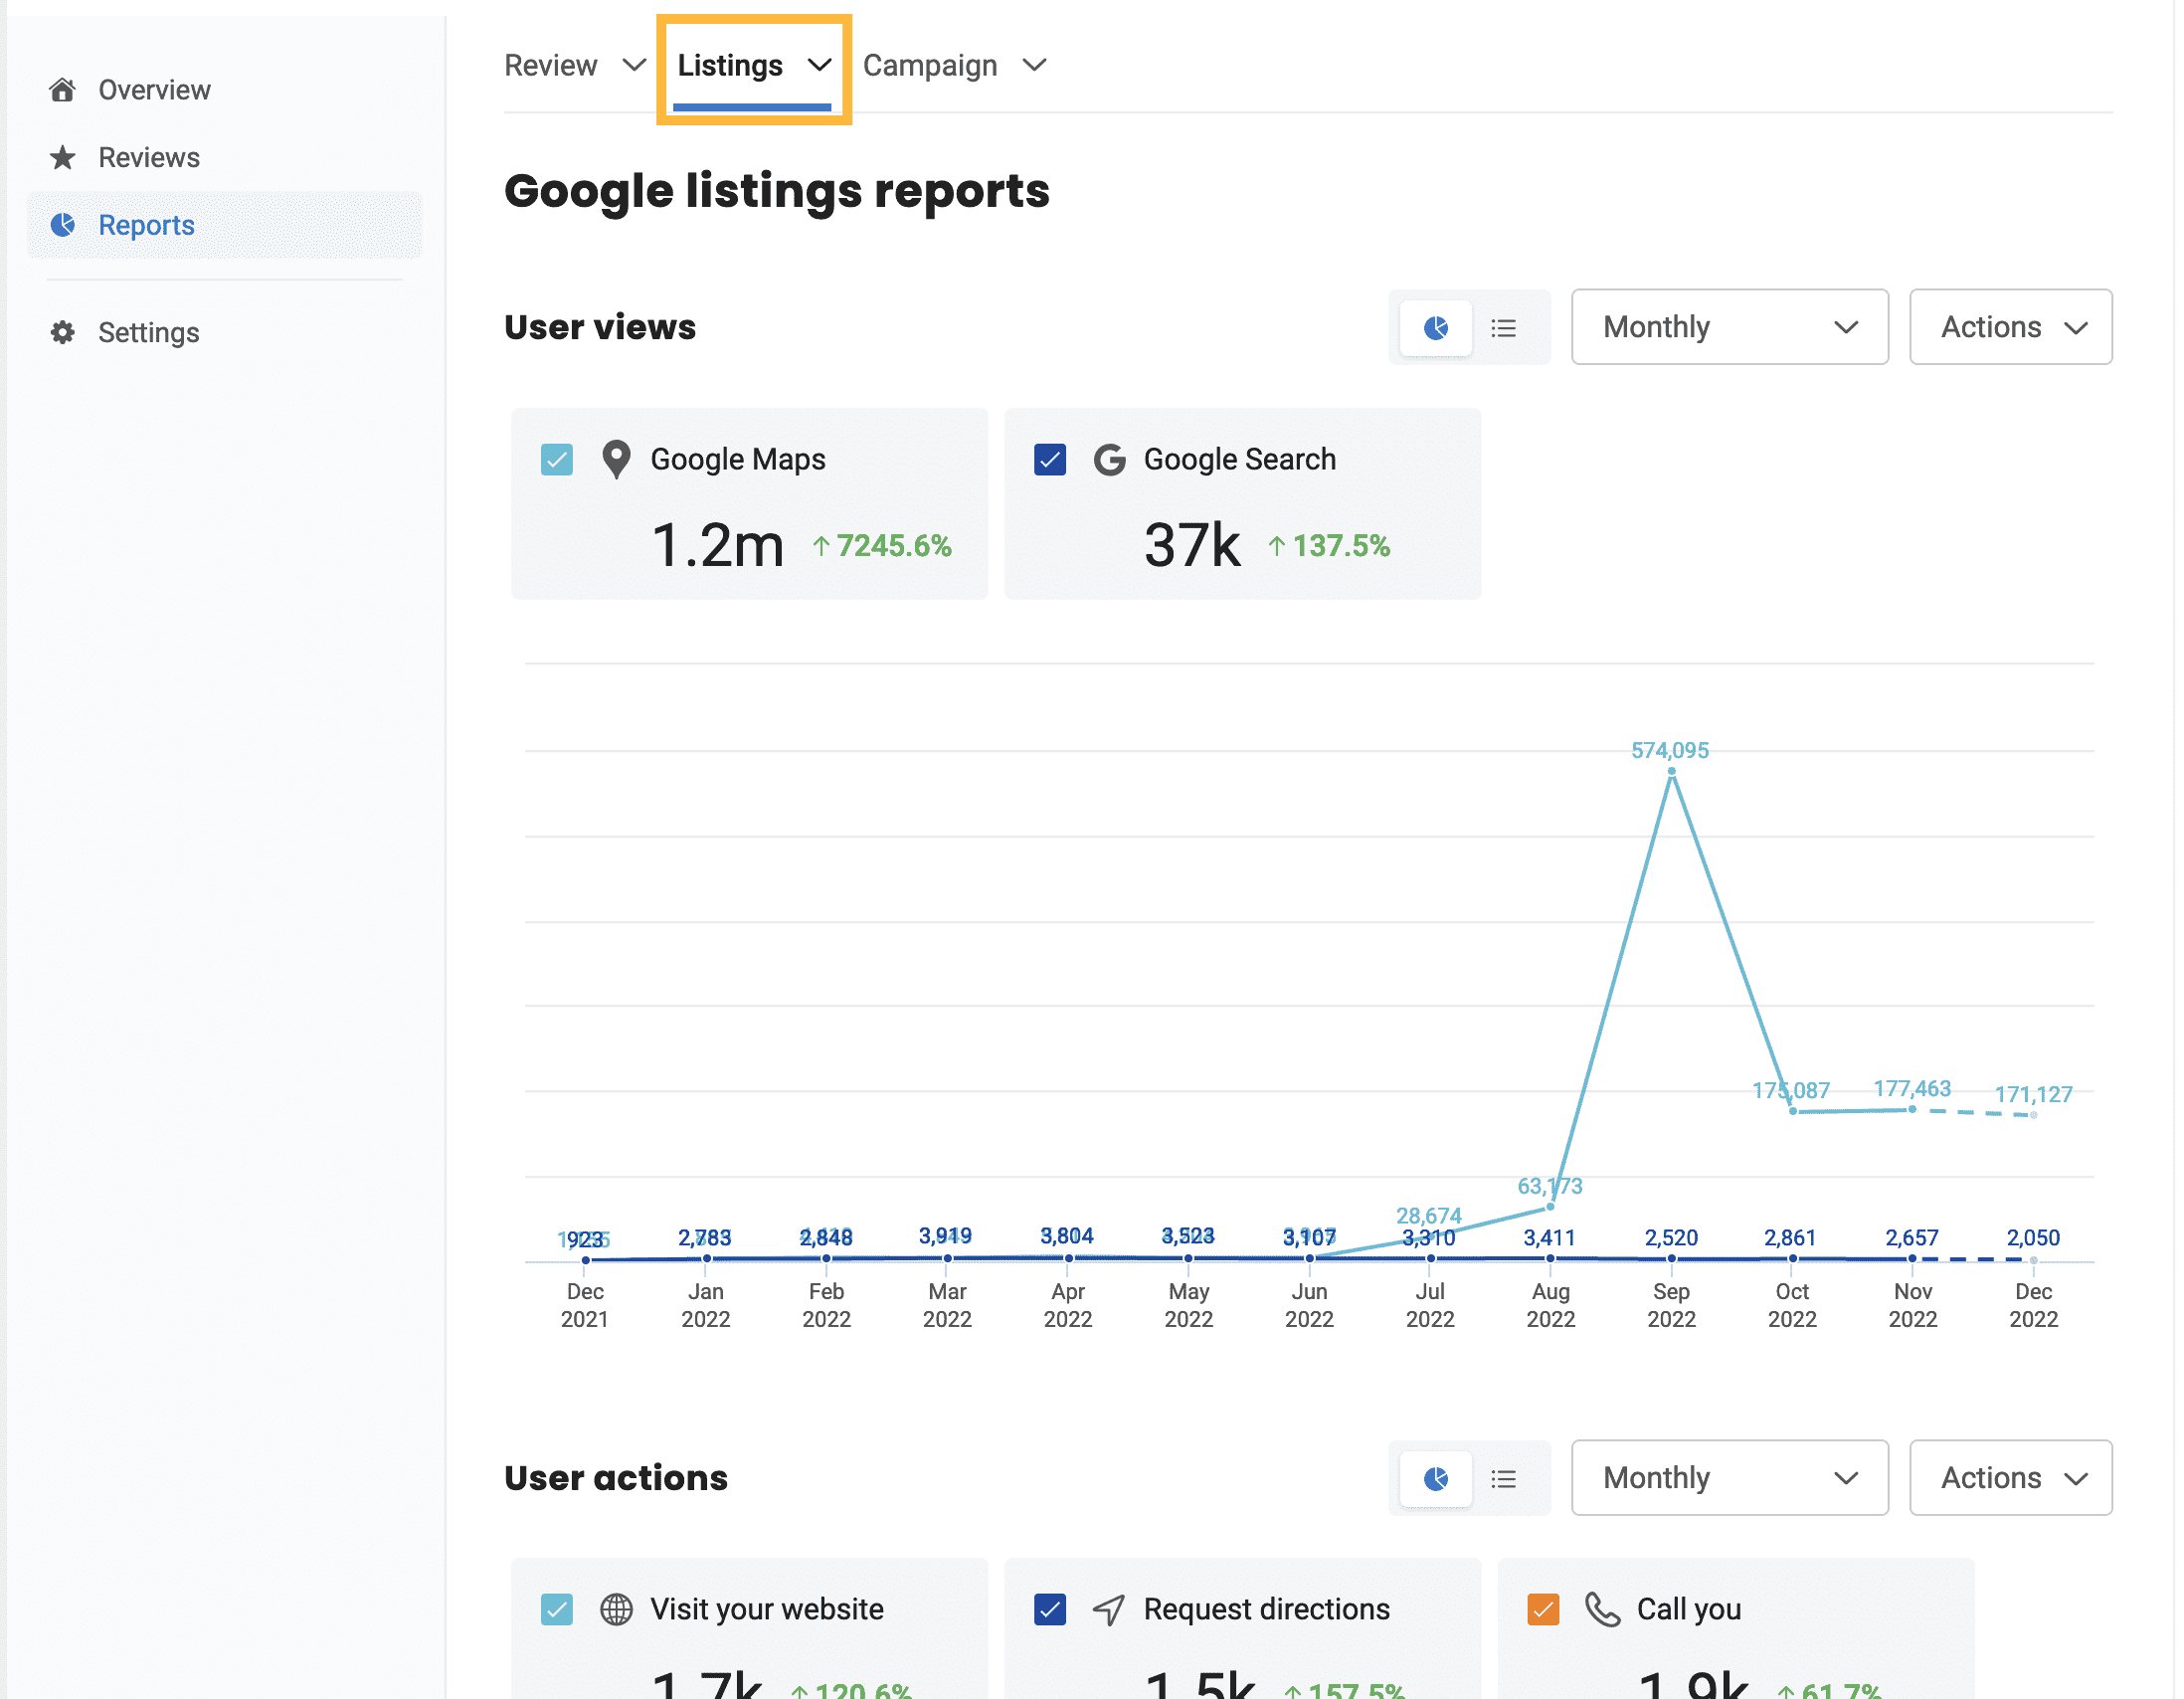
The ‘Reports’ item in the left sidebar offers a variety of graphs and statistics about your incoming reviews. Click on Reports, then hover over the ‘Reviews’ tab in the top to see all the review reporting options.

If you’ve connected your Google account to your Reviews Dashboard, then you can see some website performance stats under the ‘Listings’ report tab.
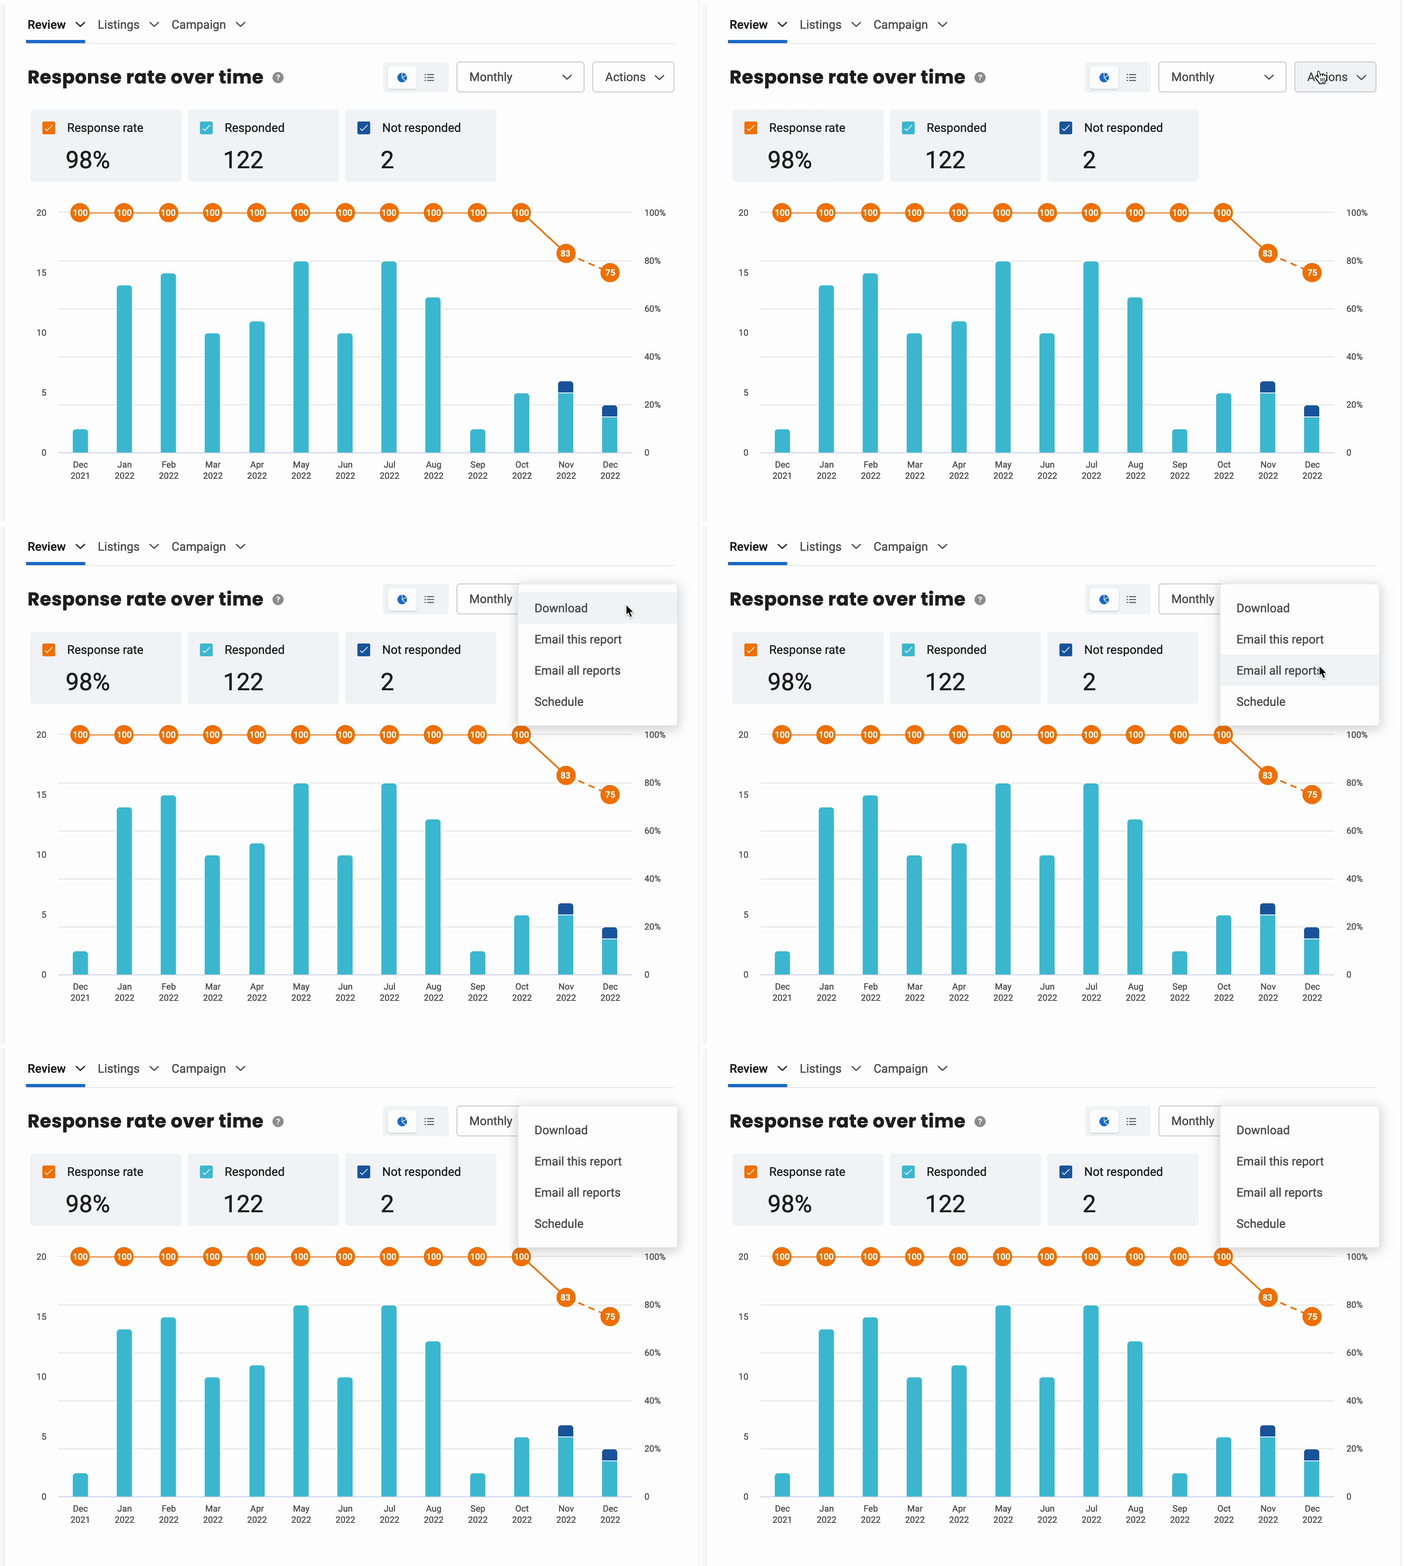
From inside any report, click the ‘Actions’ button to download, email, or schedule regular emails of this report.
ACTIVATING YOUR REVIEW MONITORING FEATURES
Turning on Negative Review Notifications- Inside your reviews dashboard, click the circle in the top right with your initials, then click “notifications”. show me »
- Click the blue “Edit notifications” button. show me »
- If you are a user on more than one account, you’ll be prompted to select the location(s) for which you want to edit notifications. Select the ones you want, then click “Edit notifications” again.
- If your cell number hasn’t been added to your account yet, you’ll see a link to add it in order to enable texting. show me »
- To receive a real-time alert when a negative review comes in, select “instantly” under the “Review text” option (here).
- This will only text you when you get a negative review – 2 stars or below – so you don’t need to worry about being interrupted too frequently.
- Double check or change your Review Email notifications to your liking.
- You can ignore all the settings below “Review text” – those only apply to the full Get Reviews upgraded package.
- Click the blue Save button on the bottom right.
Sharing to Social Media and Your Website
Connecting our Reviews system to your social media accounts will allow you to automatically share new, positive reviews to Facebook or Twitter without ever lifting a finger. We can also add a widget to your website that will automatically display your best reviews!
Contact your Digital Marketing Specialist to have those sharing options set up.
ACCESSING YOUR ACCOUNT
How do I log in to my Reviews dashboard?
Start by logging into your Perfect Patients dashboard, select Reviews on the left, then click the “View all reports” button. No need for any other usernames or passwords.
There’s not a way to do this yourself, but our team is more than happy to help you. Just contact your Digital Marketing Specialist and let them know the name, email address, and phone number of the user you’d like to add.
