
How to Select, Schedule & Manage Posts in Get Social
Get Social makes it easy to keep your practice’s Facebook and Instagram pages active with engaging, ready-to-share content!
Whether you’re sharing helpful patient tips, promoting your services, or connecting with your community, Get Social helps you plan and schedule posts right from your website dashboard.
Follow these simple steps to get started!
Don’t have your social media accounts set up yet? Check out our guides:
- How to Create a Facebook Business Page
- How to Create and Set Up an Instagram Business Account
- How to Connect Facebook & Instagram to Get Social
Step 1: Choose Your Social Graphics
Log in to your website dashboard and select Get Social from the menu.
You’ll find a selection of ready-to-use social graphics designed to help you engage patients, promote your services, and grow your practice.
Our social graphics cover a variety of topics, including:
- Reach New Patients
- Retain Patients
- Get Referrals
- Educate Patients
- Generate Reviews
- Promote Your Services
- And more!
Browse the available graphics and choose the ones you’d like to share with your audience.
Tip: Mix up your content! Sharing a variety of educational, engaging, and promotional posts helps keep your social media pages interesting.
Step 2: Add Your Posts to the Scheduler
Once you’ve found graphics you’d like to share, you can schedule them individually or select several at once.
To Schedule Multiple Posts
- Click the checkbox at the top of each graphic you’d like to schedule.
- Click the green Schedule Posts button.
- Your selected posts will be added to the scheduling drawer.
To Schedule a Single Post
Simply click the Schedule button on the graphic you’d like to share.
The post will be added to the scheduling drawer, where you can customize and schedule it.
Step 3: Customize & Schedule Your Posts
Now it’s time to personalize your posts and choose when they’ll be published!
- Review the graphics you’ve added to the scheduling drawer.
- Customize the accompanying text as needed to reflect your practice’s personality and message.
- If both Facebook and Instagram are connected, choose whether to publish to Facebook, Instagram, or both.
- Select a publish date from the calendar.
- Choose the time you’d like your post to go live.
- Click Schedule Posts to finish.
That’s it! Your posts are scheduled and ready to be published automatically at your selected dates and times.
Tip: Set aside a few minutes each week to schedule your social media content in advance. It’s an easy way to maintain a consistent online presence!
Explore More Get Social Features
Get Social includes several helpful tools to make creating and managing your social media content even easier.
Not quite what you’re looking for? No problem!
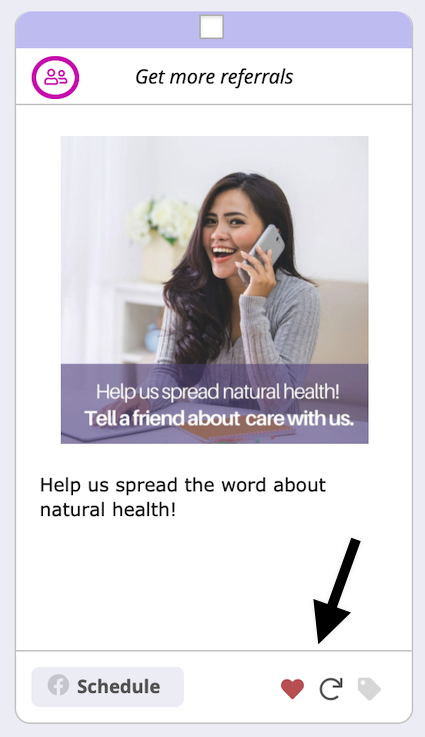
Click the refresh arrow at the bottom of a graphic to replace it with another option.
This is a quick way to explore different content suggestions without leaving your dashboard.
Browse the Social Library
Looking for something specific?
Click Social Library in the upper-right corner of your Get Social dashboard to browse hundreds of additional graphics.
Choose content that fits your practice’s needs and add it to your schedule.
Create Your Own Post
Want to share a team photo, promote an upcoming event, or create a custom announcement?
You can upload your own graphics and create personalized social media posts!
- Click Create Social Post from your Get Social dashboard.
- Alternatively, select Create and Schedule Another Post from the scheduling drawer.
- Upload your image and add your accompanying text.
- Choose your social network, publish date, and time.
- Schedule your post.
Tip: Consider sharing photos of your team, practice updates, special events, or other content that helps patients feel connected to your practice. Always obtain appropriate permission before sharing patient photos or information.
Save Your Favorite Graphics
Found a graphic you love but aren’t ready to schedule it yet?
Click the heart icon on the graphic to save it to your Favorites.
To find your saved graphics later:
- Click Social Library.
- Select Favorites.
- Browse your saved graphics and schedule them whenever you’re ready.
Manage Your Scheduled Posts
Need to make a change to a post you’ve already scheduled? Get Social makes it easy to review and manage your upcoming content.
- From your Get Social dashboard, click Manage Posts.
- Find the post you’d like to update.
- Use the Actions menu to edit or delete the post.
Editing a Post: Click the pencil icon to update a post that’s still scheduled. You can make your changes before it goes live.
Deleting a Post: Use the delete option to remove a scheduled post you no longer want to publish.
Important: The edit option is only available for posts with a Scheduled status. Once a post has been published, it can no longer be edited through the Get Social scheduler.
Customize Your Default Settings
Want to save a few clicks when scheduling posts? You can customize your default publishing preferences in Get Social!
Set Your Default Publish Time
If you usually schedule posts for the same time of day, you can save that time as your default.
- Open the Settings tab in Get Social.
- Find Default Post Publish Time.
- Select your preferred posting time.
- Click Save to update your settings.
Your preferred time will now be automatically selected when scheduling future posts.
Choose Your Preferred Social Networks
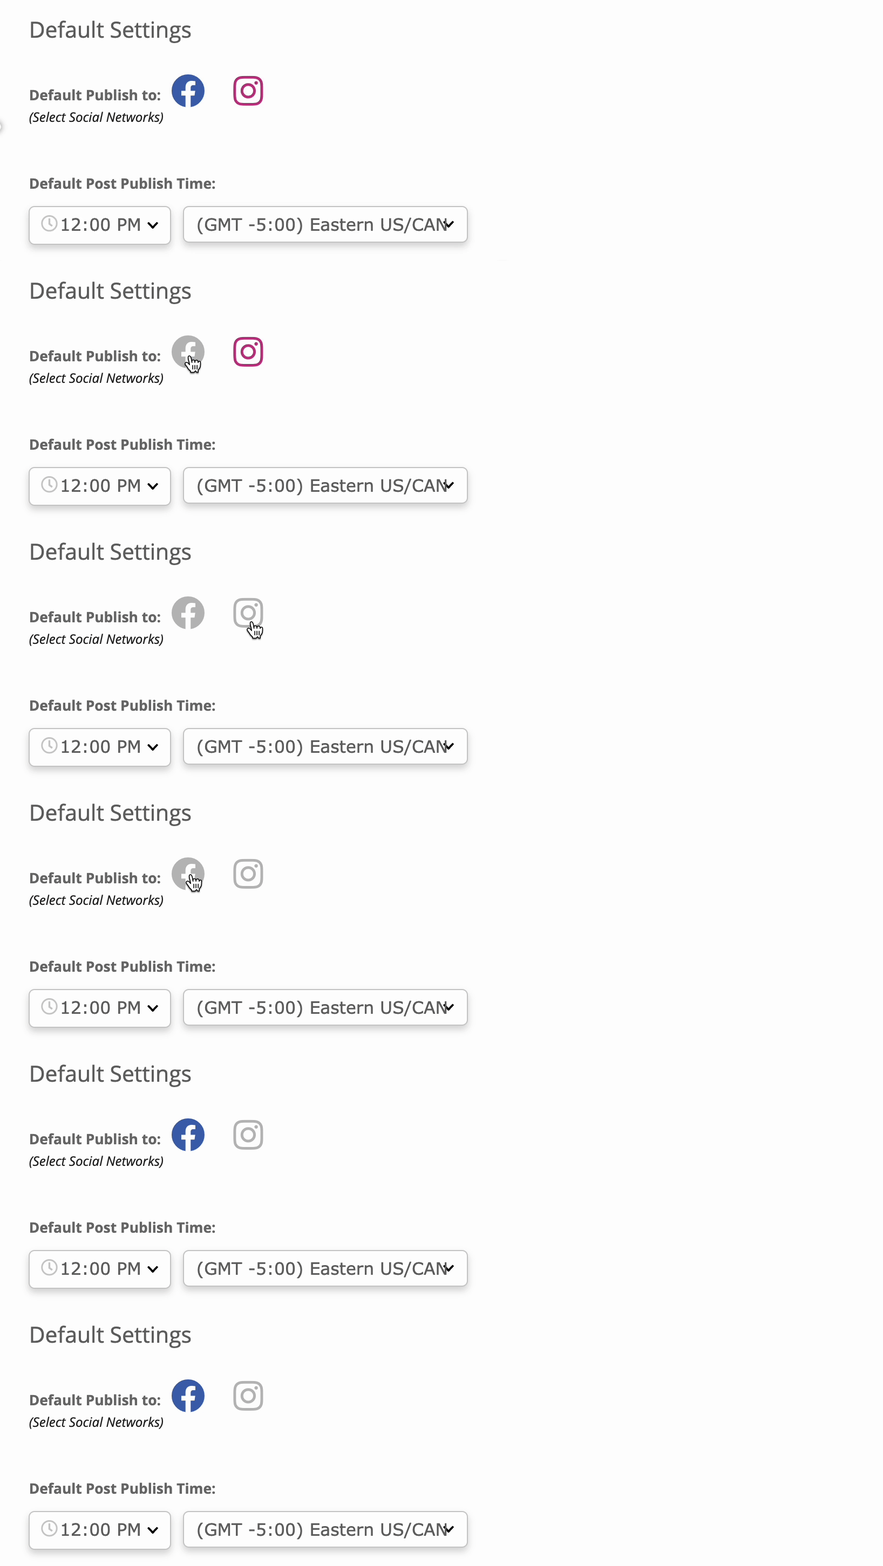
If you’ve connected both Facebook and Instagram, Get Social is set to select both networks by default when scheduling posts.
Prefer to post to just one network most of the time? You can update this setting.
- Open the Settings tab.
- Find your default social network preferences.
- Select or deselect the networks you’d like to use by default.
- Click Save to apply your changes.
Tip: You can still choose a different social network when scheduling an individual post, regardless of your default settings.
Frequently Asked Questions
How do I include a link to a website page in my post?When customizing your post, add the full website URL to the accompanying text.
For example, you might include a link to your services page, a helpful blog article, or your online appointment booking page.
Tip: Instagram captions don’t generally support clickable website links. For Instagram posts, consider directing followers to the website link in your Instagram bio.
How do I add hashtags to my posts?
Simply type your hashtags directly into the post text when customizing your content.
For example: #HealthySmiles #DentalCare #YourPracticeName
Choose hashtags that are relevant to your post and your practice.
Is there a limit to how many posts I can schedule?
You can use Get Social to plan and schedule content in advance. Keep in mind that social networks may have their own publishing limits or restrictions.
For the best results, focus on sharing a consistent mix of helpful, engaging, and relevant content rather than posting too frequently.
Can I edit or delete a post after it's been published?
Once a post has been published to Facebook or Instagram, it can no longer be edited through the Get Social scheduler.
To make changes to a published post, you’ll need to visit the social media platform directly.
Stay Connected With Your Audience
Scheduling your posts is just one part of building an engaging social media presence!
Remember to check your Facebook and Instagram notifications regularly so you can respond to questions, comments, and messages in a timely manner.
Engaging with your audience helps build relationships and keeps your practice connected with your community.
Need Additional Help?
We’re here to help you make the most of Get Social!
If you have questions or need assistance, click Share Feedback from your Get Social dashboard or select Request Support to contact our team.
Happy posting!