Automated Emails & Stats
In the Email Center, you’ll now see a new page for “Automated Emails” which shows ALL the emails we send to subscribers on your behalf (Newsletter, Blog Post rollup, Welcome/Survey, Birthday, eLearning and Blog Signup) and stats, including a way for you to click to see specifically who opened, clicked and bounced.
We are especially excited to be able to now offer you a way to customize your automated email text (a very popular request we’ve received over the years!) The birthday email, all variations of the welcome/survey, and blog rollup email text can now be customized right in your dashboard!

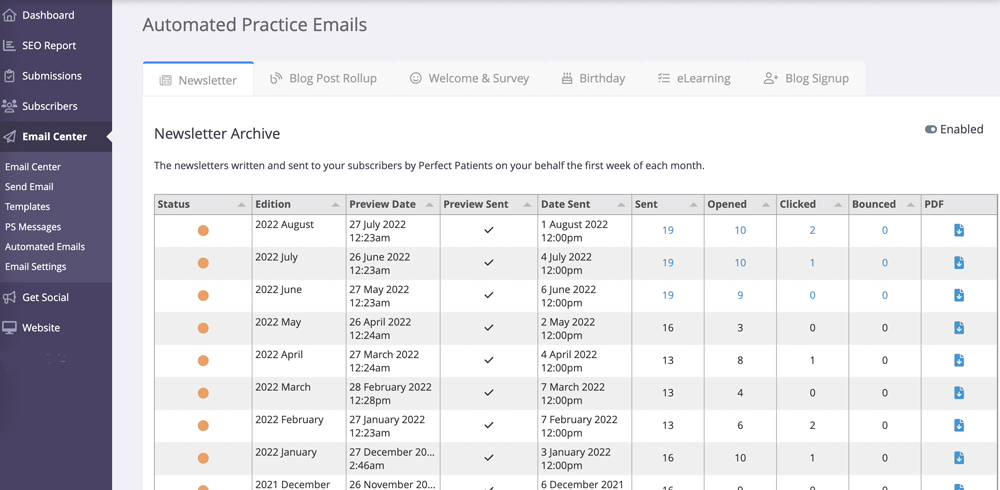
Preview Date: Date the newsletter was emailed to you
Preview sent: √
Date Sent: Date and time the newsletter was sent to your subscribers.
Stats: Sent | Opened | Clicked | Bounced
– you can click on each of these numbers to see which subscribers actually opened the newsletter.
PDF: A PDF copy of your newsletter can be downloaded here.
Status:
New
Sent
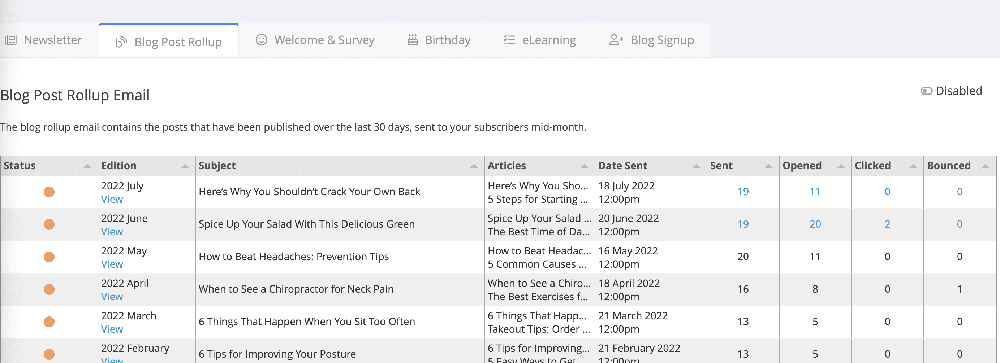
Date Sent: Date and time the blog email was sent to your subscribers.
Stats: Sent | Opened | Clicked | Bounced
– you can click on each of these numbers to see which subscribers actually opened the blog email.
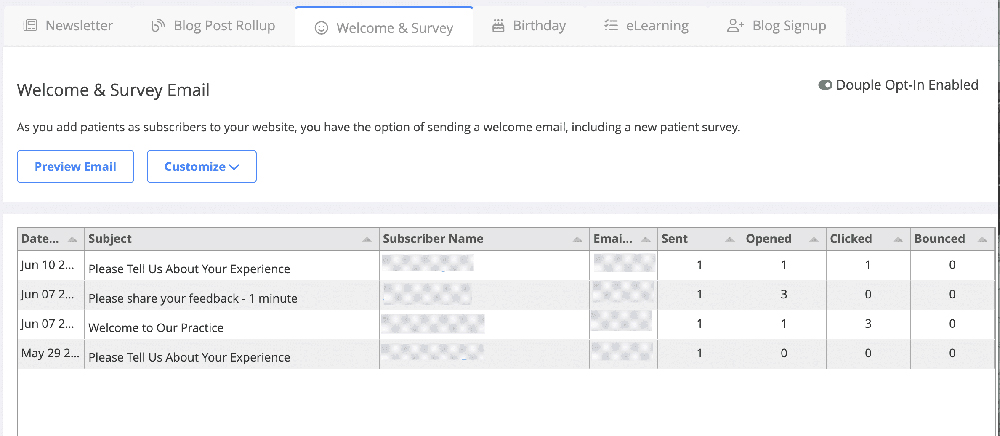
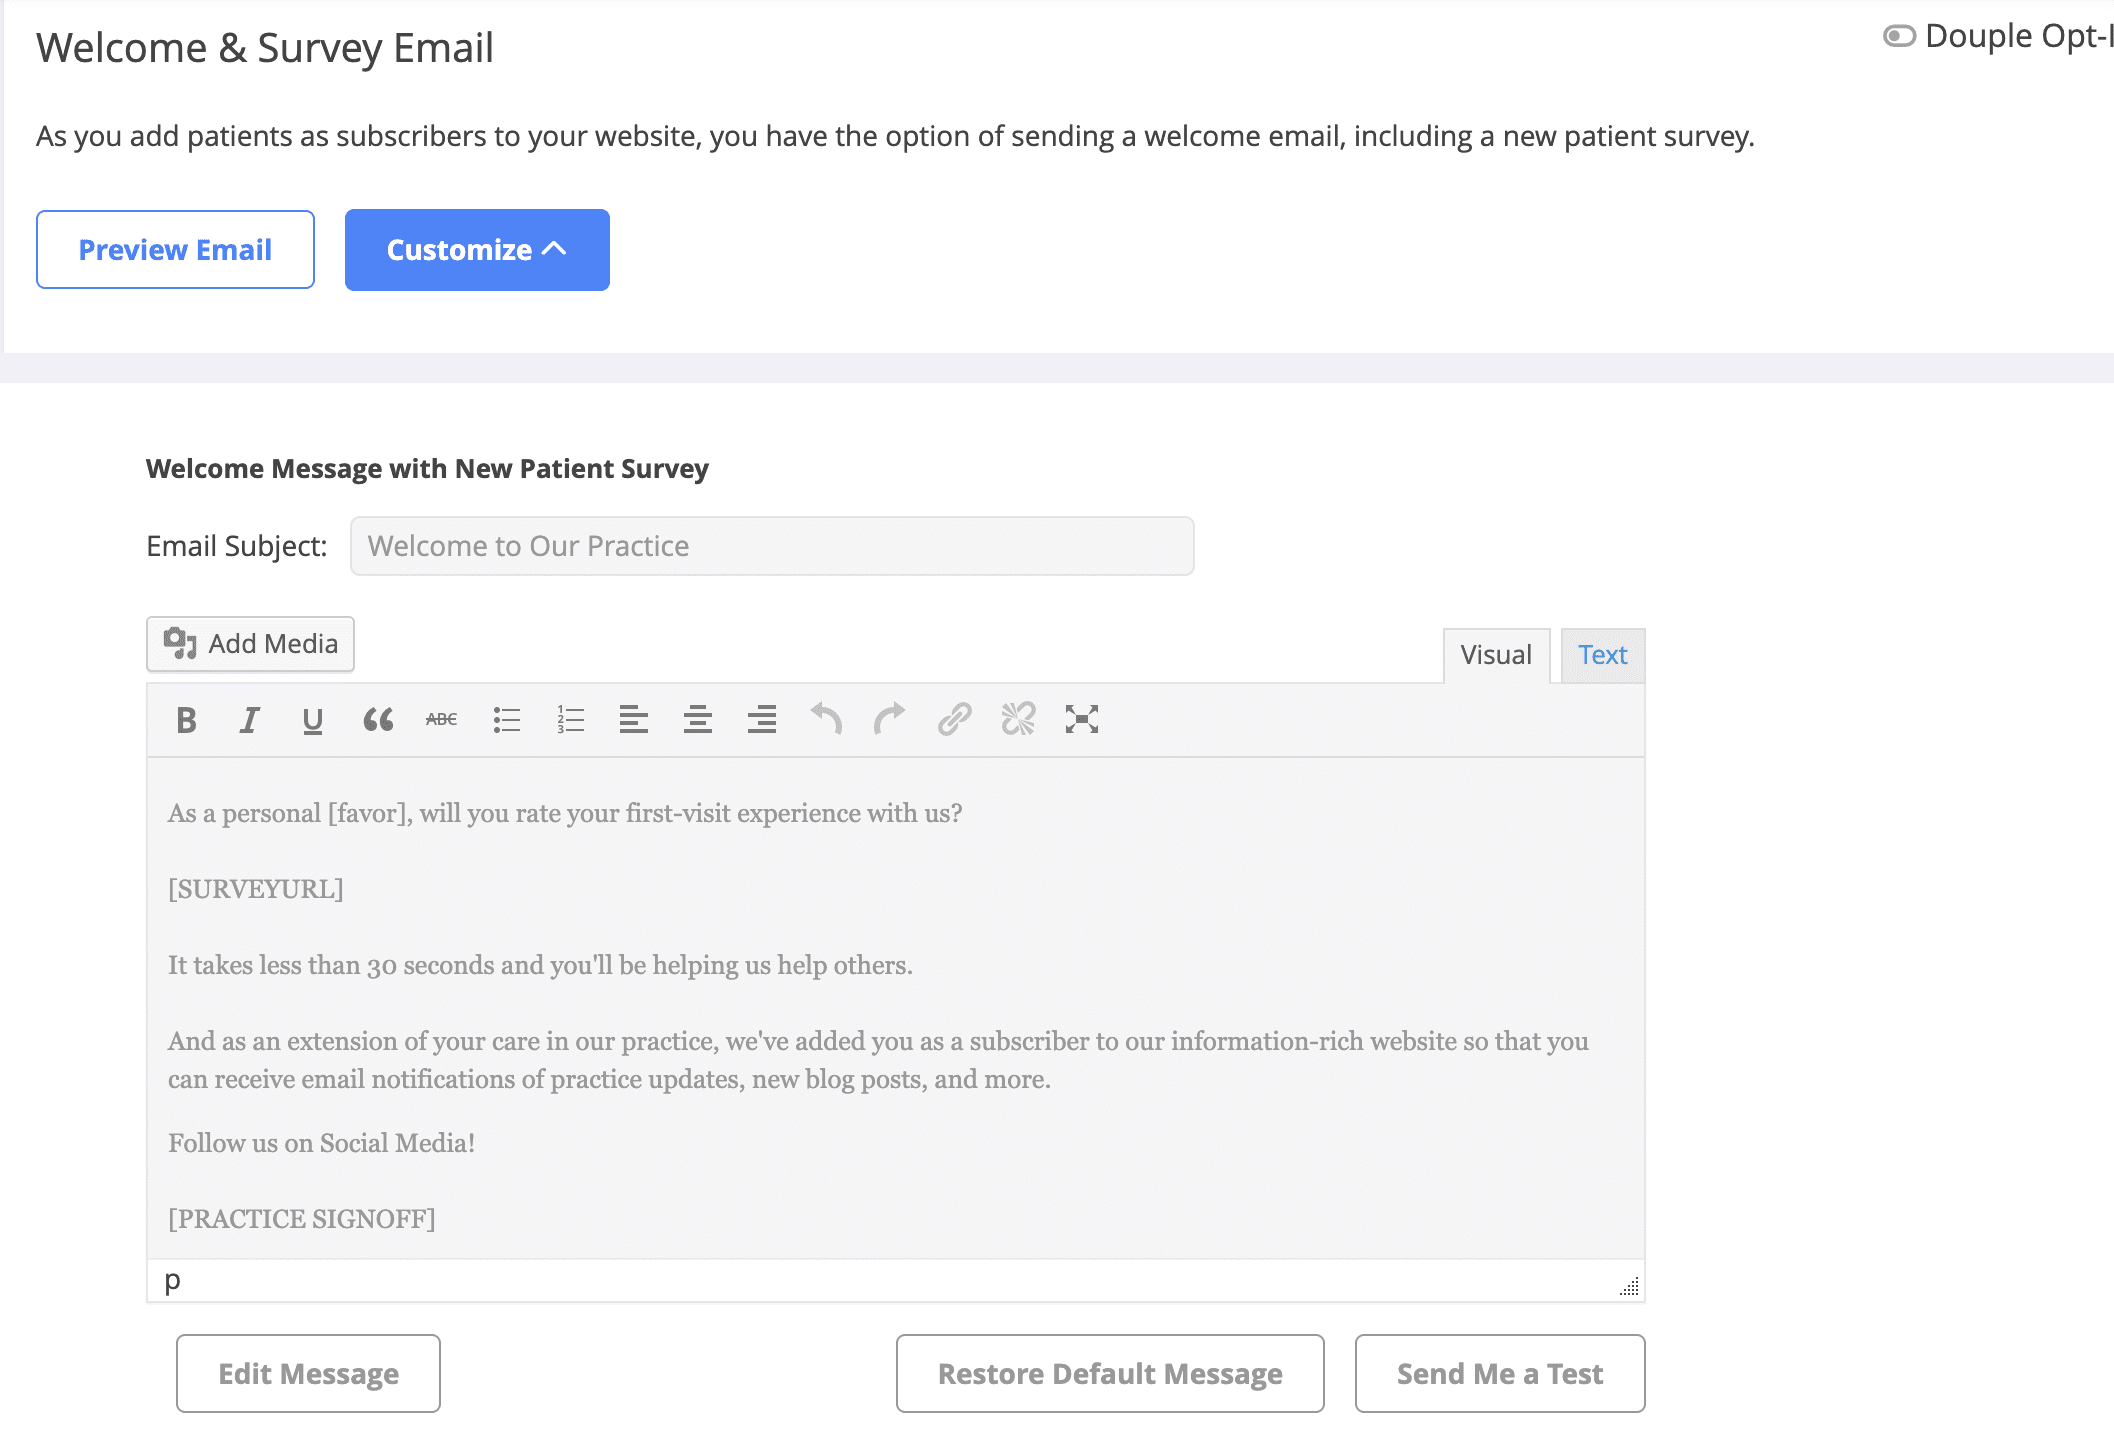
Preview Email: click to see a preview of the current email.
Customize: Click and you now have the option to customize
Welcome message with New Patient Survey
Survey Reminder Email
Welcome message with No Survey
Simply click the ‘Edit Message’ button below the text box, make your change, and then press the green ‘Save’ button.
Not happy with your edit? You can click ‘Restore Default Message’ to remove any edits.
You can also now click on ‘Send Me A Test‘ to see what your update looks like.
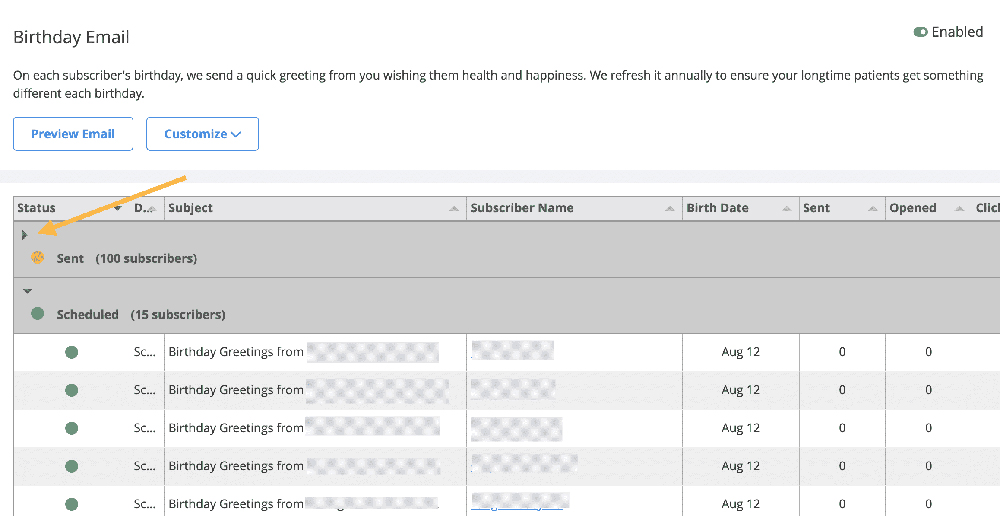
Sent
You can click the arrow to open up the SENT area to see which subscribers received a birthday greeting.
Scheduled
See which subscribers have birthdays coming up!
Preview:
See what the Birthday currently looks like.
Customize:
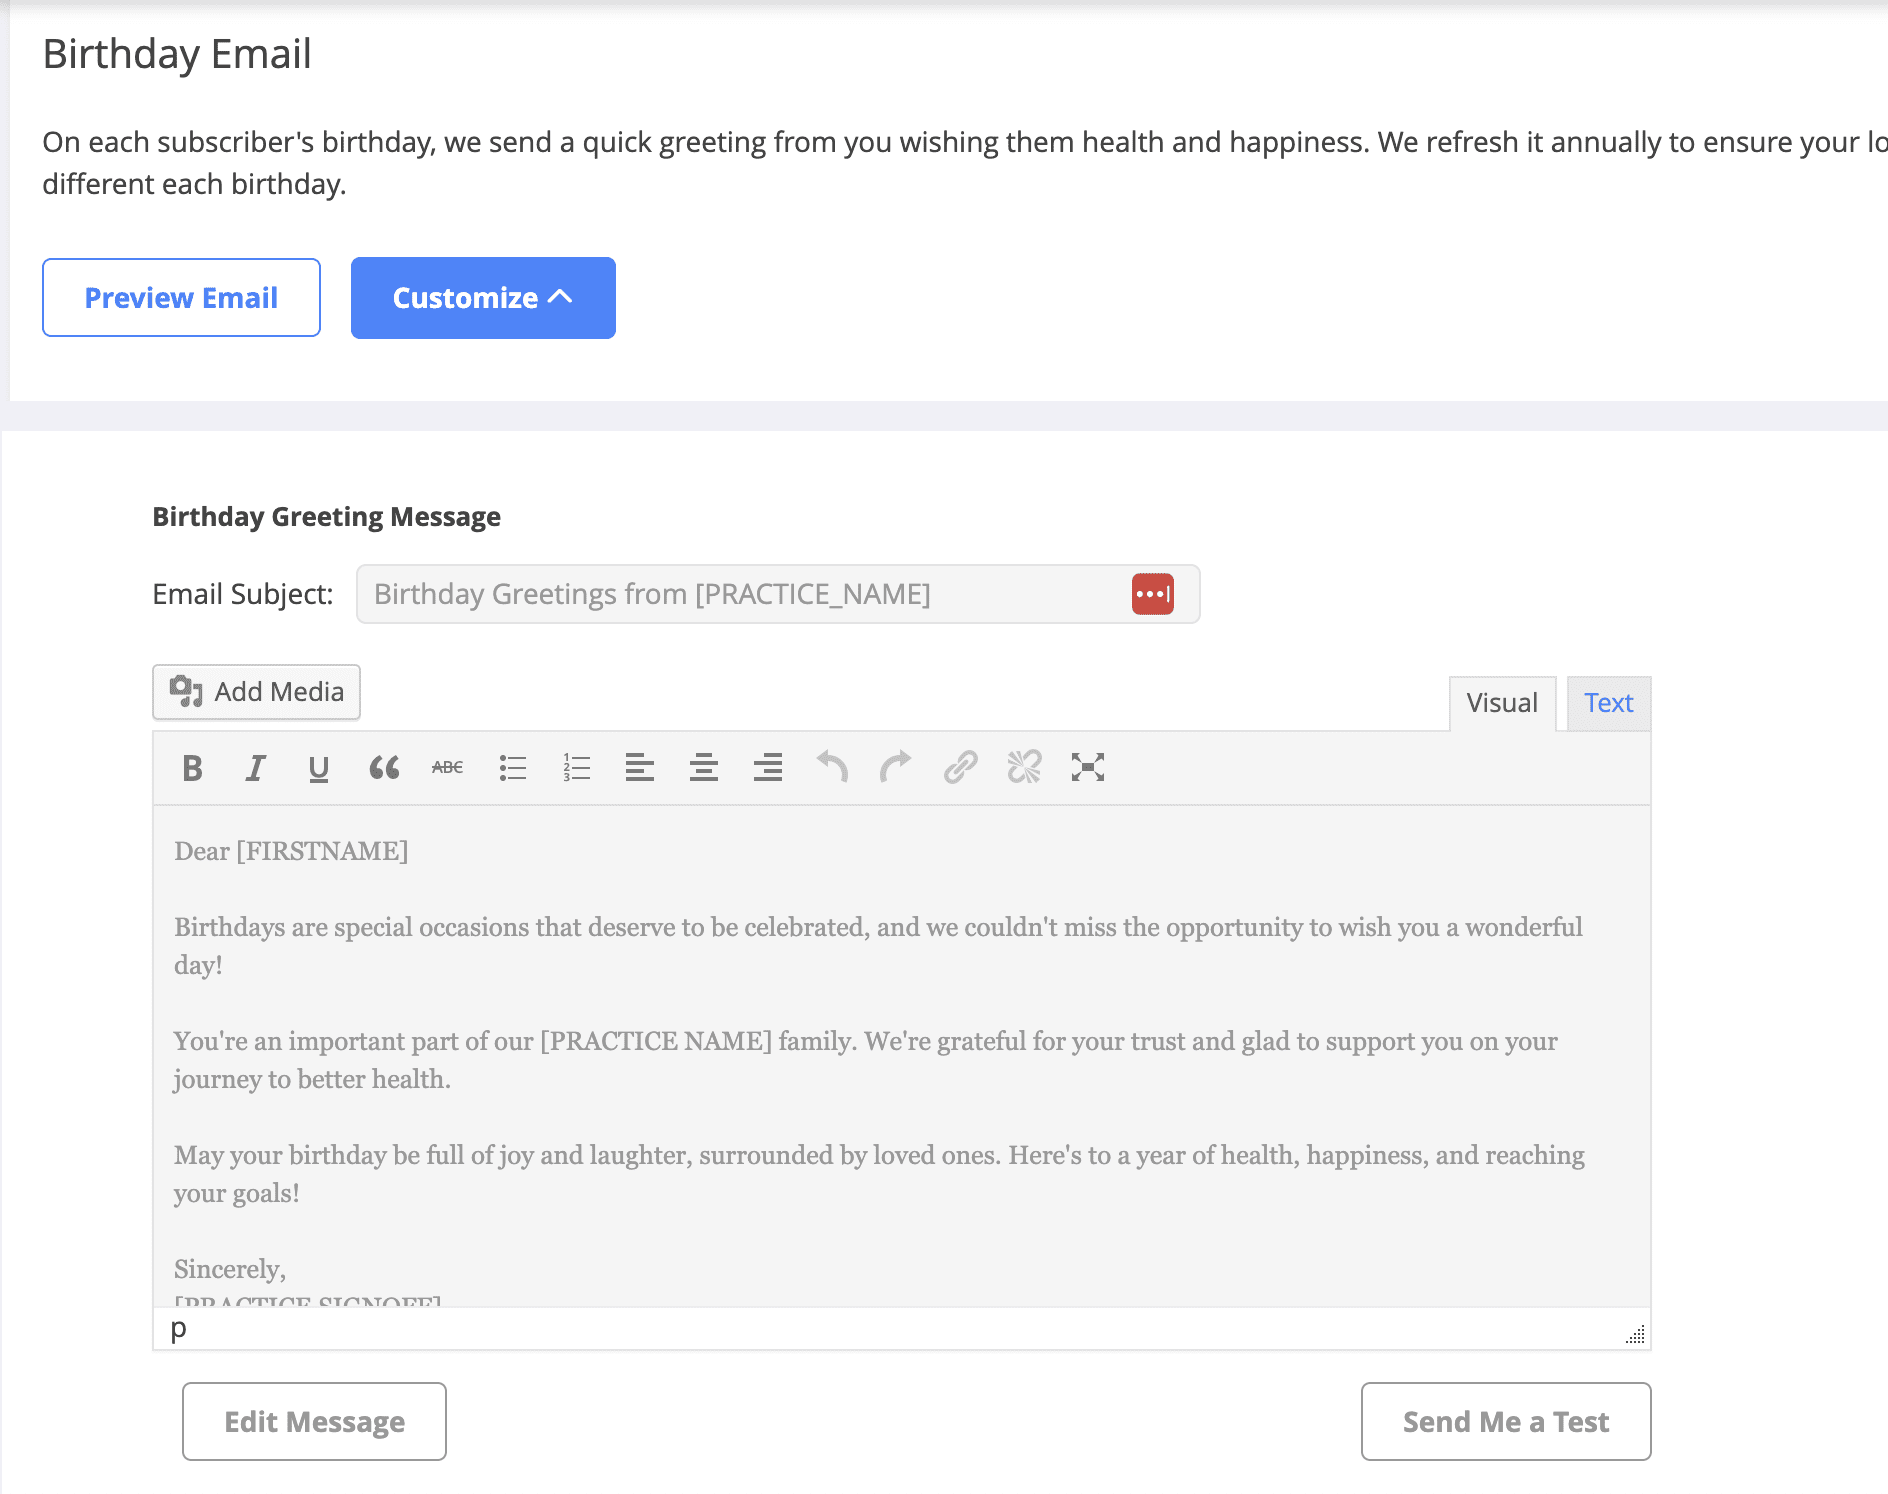
You can click the ‘Customize’ button to edit the Birthday greeting to suit your needs.
– Click ‘Edit Message’
– After you make your change, click ‘Save’.
– Not happy with your change? Click ‘Restore Default Message’ to remove your edits.
– Want a preview of your email edits? Click on ‘Send Me a Test’
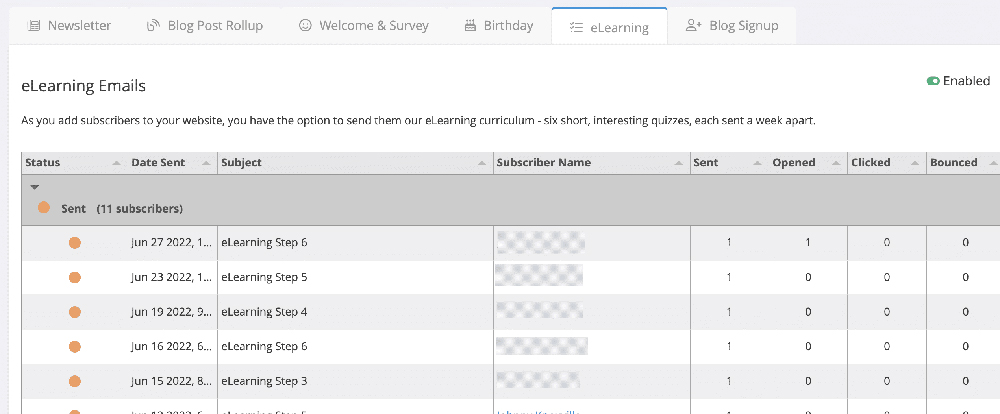
If you are using the eLearning modules, you will find stats on when it was sent, to who, and did they open it!
If a visitor has signed up for your blog from your website, you will see the stats here.
If someone signed up, they will need to click the link in the email they receive to ‘confirm’ they really want to receive your blogs.
– You can see in the last column if they clicked to confirm or not.
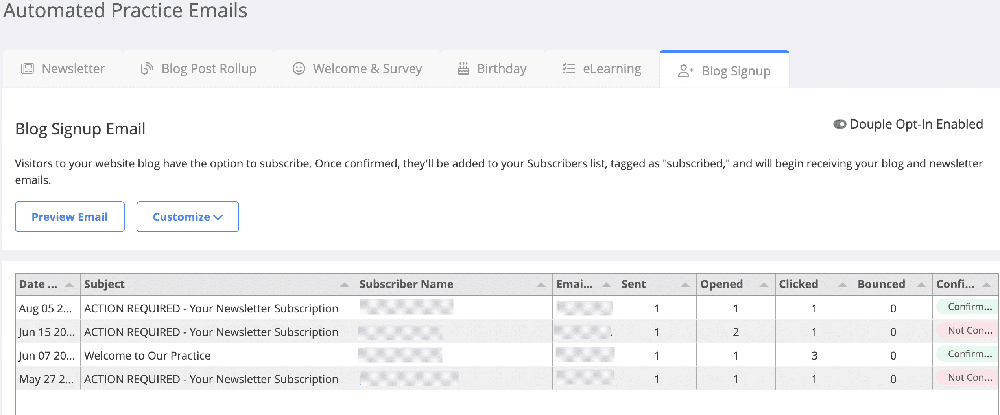
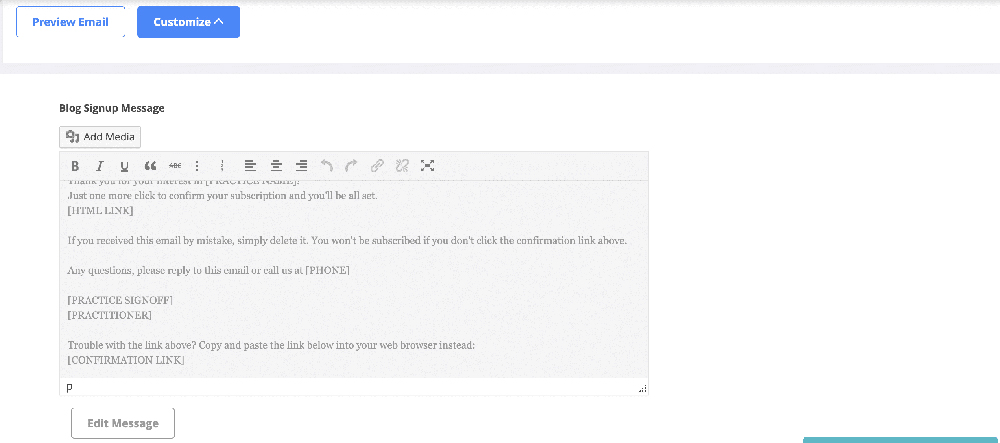
Editing The Blog Signup Email:
You can click the ‘Customize’ button to edit the email to suit your needs.
– Click ‘Edit Message’
– After you make your change, click ‘Save’.
– Not happy with your change? Click ‘Restore Default Message’ to remove your edits.
