Outlook IMAP Email Setup Guide (07, 10, 13)
The following guide should help you make your way through setting up email on Windows 10. If you have any trouble, please don’t hesitate to let us know and we’ll be happy to walk you through it.
Username: Full email address (example: bob@drbob.com)
Hostname: secure.emailsrvr.com
Incoming Port: 993
Outgoing Port: 465
SSL: Enabled
Update Your Temporary Password
The password we’ve provided is a TEMPORARY password only; it is NOT secure. PLEASE make sure that you update it immediately. To change your email password, first log into the account via webmail.
- Select Settings in the upper right corner under your name
- Select Change Password
- Enter the Current Password (you were provided with this at the time of account creation)
- Enter the New Password of your choice
- Re-enter the New Password to confirm
- Click Save
We recommend that you always change your password before adding your email account to Outlook or a phone, that way you do not have to go back in later to change it.
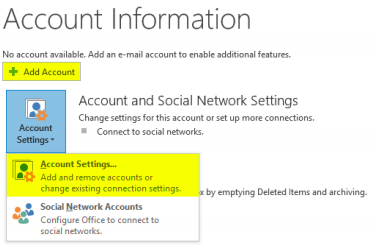
Add an Account
Click File at the top of your Outlook application. If this is a new Outlook install, click the Add Account button.
If you already have an email account setup, please select Account Settings and then New.
On the new window, select Manual setup or additional server types and click Next.

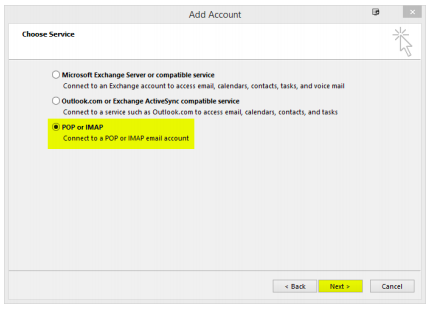
Select POP or IMAP and then click Next.
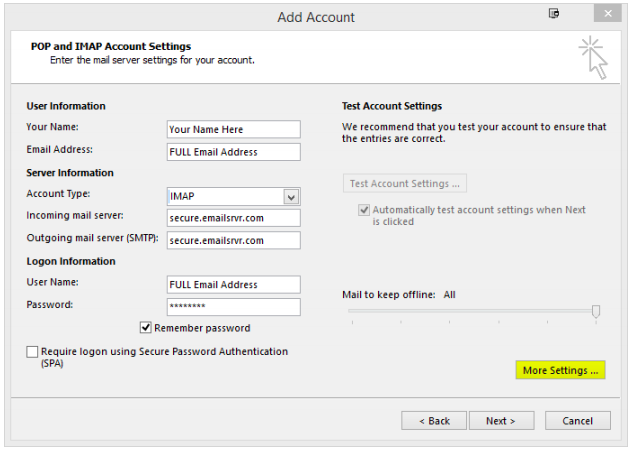
On this new screen, you need to provide the following:
- Your Name
- Email Address: Your FULL email address
- Account Type: IMAP
- Incoming mail server: secure.emailsrvr.com
- Outgoing mail server: secure.emailsrvr.com
- Username: Your FULL email address
- Password: Your selected password
Once you have filled out the above information, click More Settings.
Port Setup
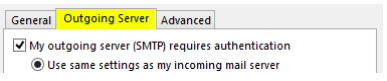
On the Internet E-mail Settings window, select Outgoing Server tab.
Check the box next to My outgoing server (SMTP) requires authentication.
Select the Advanced tab to set your server ports.
- Click the drop down box next to Use the following type of encrypted connection: set to SSL.
- Incoming server (IMAP): 993
- Outgoing server (SMTP): 465
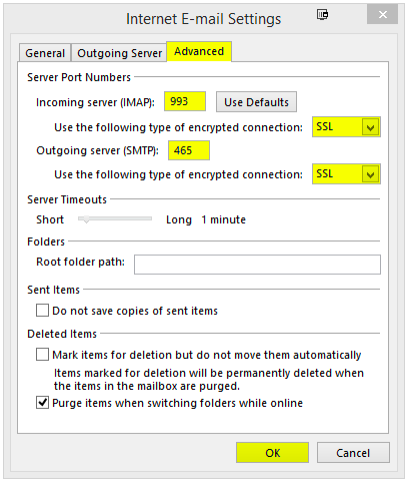
Click OK when finished. This will bring you back to the original Add Account window. Click Next.
Test Account Settings
A new window will pop up entitled Test Account Settings. Allow this to complete. It should look like the window below.
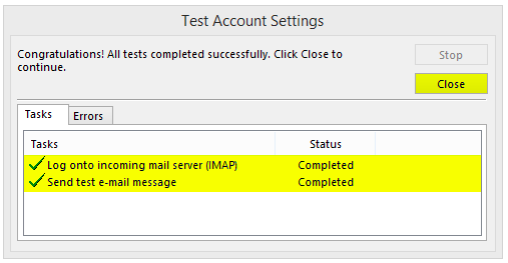
Click Close.
You’re finished!

Still have questions? Don’t hesitate to call or contact us at support@perfectpatients.com. We look forward to hearing from you!