
HOW TO
Publish & Schedule Social Graphics to Facebook & Instagram from Your Dashboard
 We are pleased to announce our new and improved social service, which is designed to make posting easier, more convenient and full of robust options to achieve your engagement goals.
Need a little help getting started? Follow the guide below to learn how to use the new Perfect Patients “Get Social” console to share curated posts crafted for your practice.
Don’t have a Facebook business page set up yet for your practice? Create one with Facebook’s helpful step-by-step video.
![]()
Each week, you will receive an email informing you that the new posts are published and ready for you.
Step 1: Login to Your Dashboard & Get Connected
Login to your Dashboard and click on “Get Social” in the left sidebar. If your dashboard is already connected to Facebook you’ll see “Connected” on your social dashboard. Proceed to Step 2.
If you need to get connected, simply click the prompt to “Connect to Schedule Posts,” then follow the Facebook prompts to connect your Facebook business page to your Perfect Patients dashboard. All requested Facebook permissions must be approved for scheduling to work.
Once Facebook is connected, then you can get connected to Instagram. Before connecting to Instagram in your dashboard, make sure your Facebook page and Instagram account are connected.
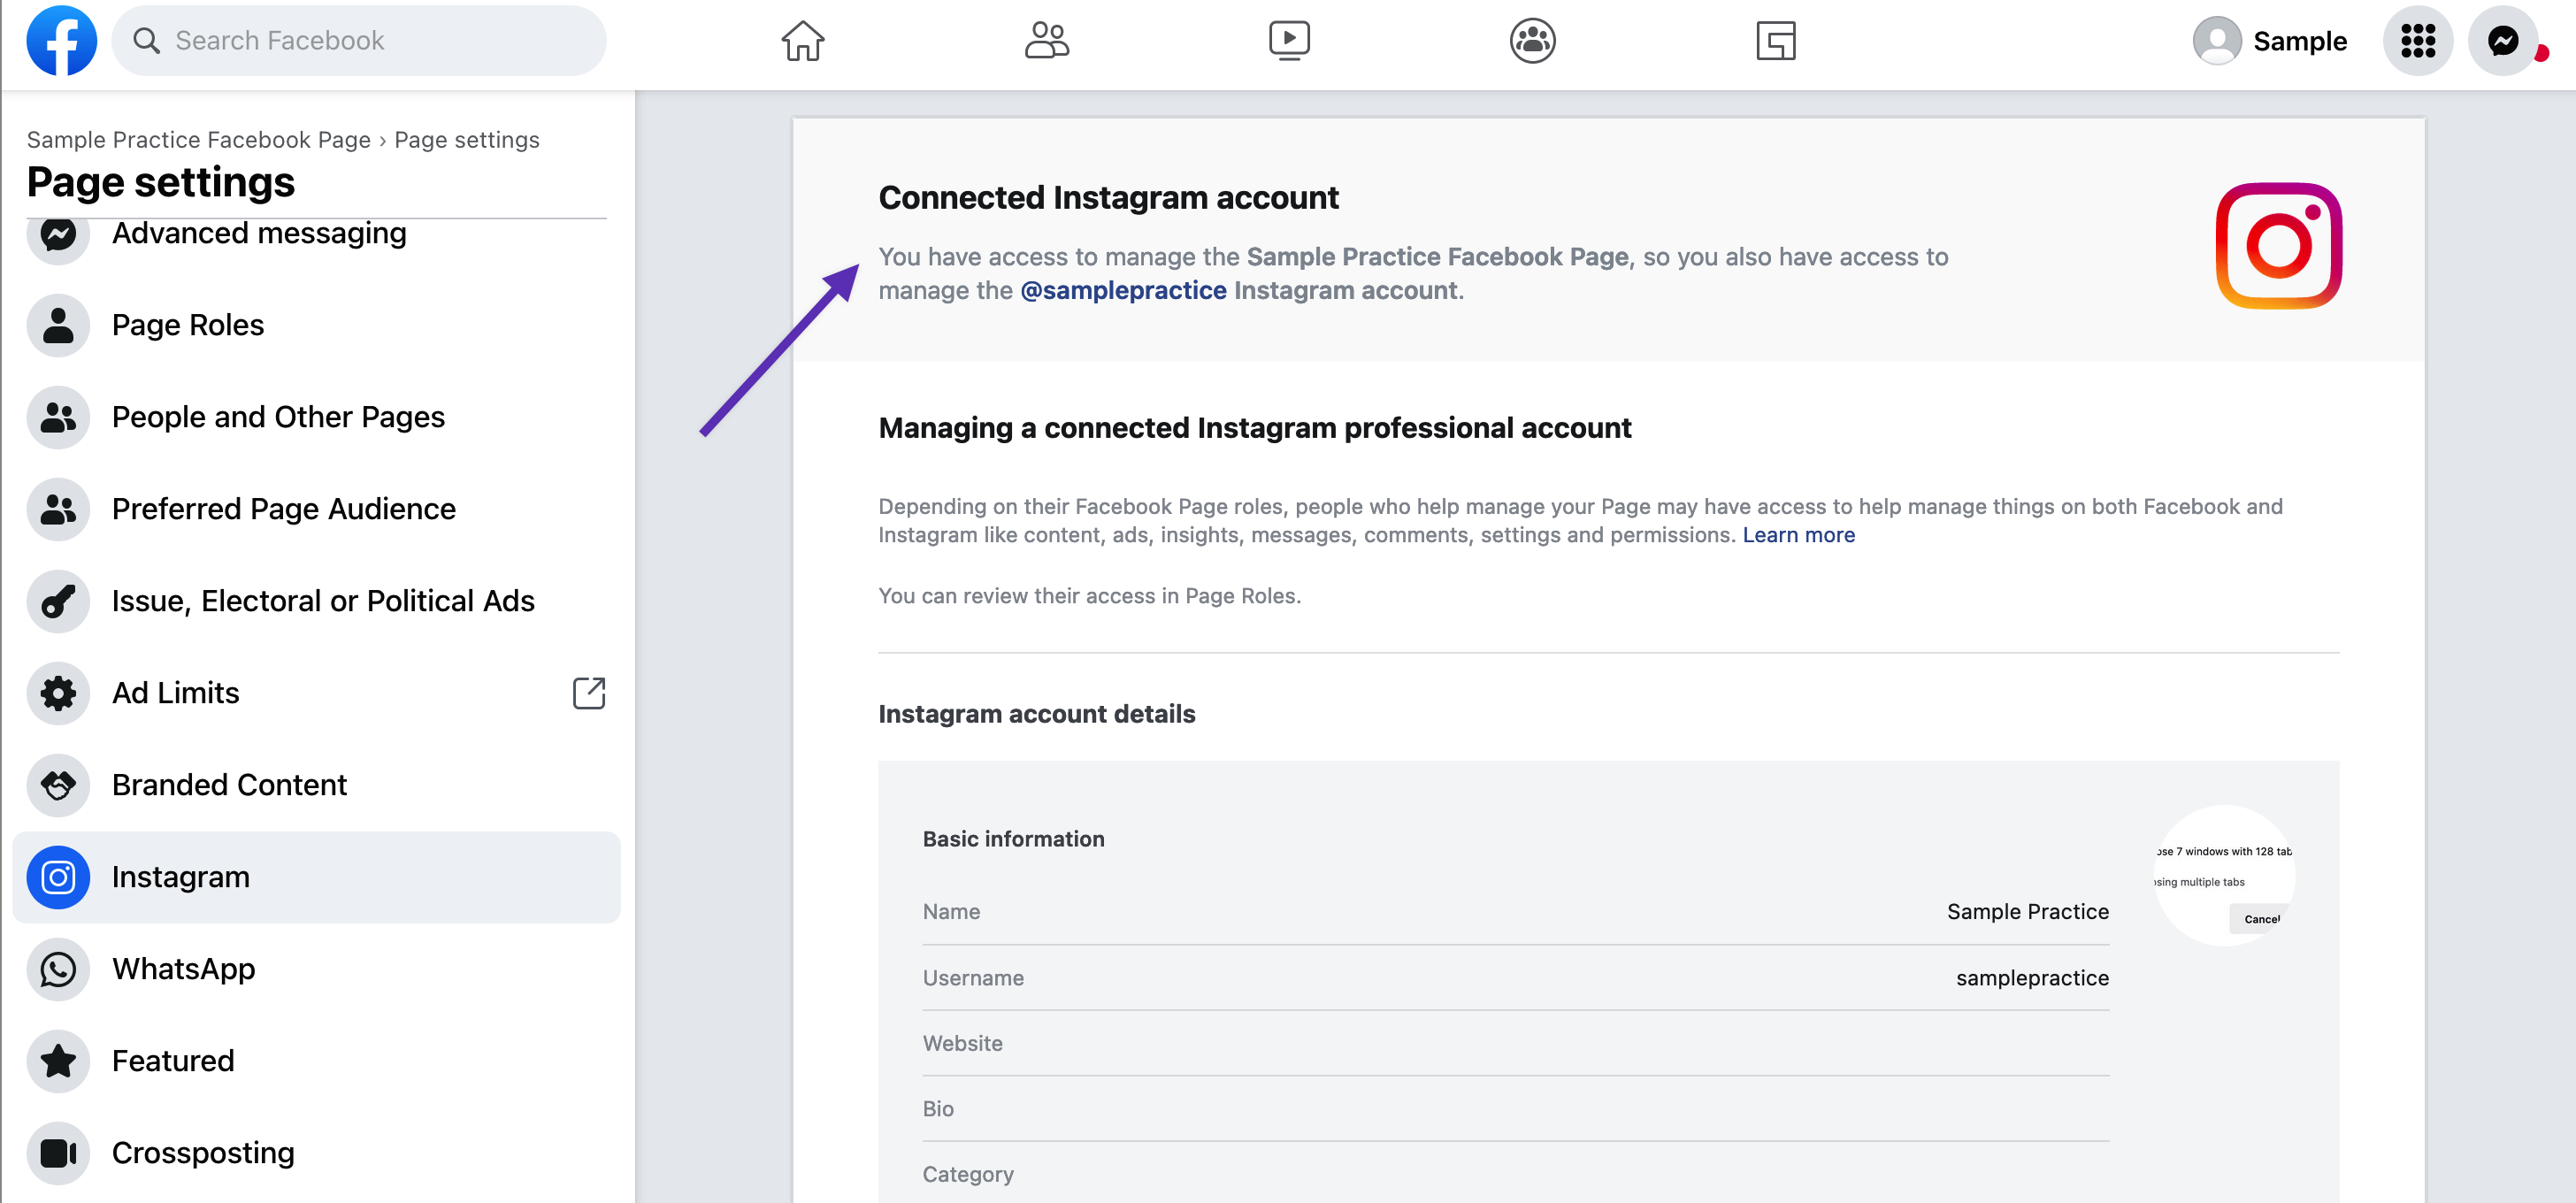
How to check if your Facebook and Instagram pages are connected- Sign in to your Facebook account.
- Select Pages on the left, and then select the Page.
- Select Settings at the bottom of the Manage Page menu on the left.
- Select Instagram from the Page Settings menu.
- If connected, it’ll show “Connected Instagram account.” You can proceed with the dashboard connection.
- Go to your website’s dashboard, click on Get Social, and then on the Settings tab. Follow the prompts to connect your business Instagram account.
How to connect your Facebook and Instagram pages
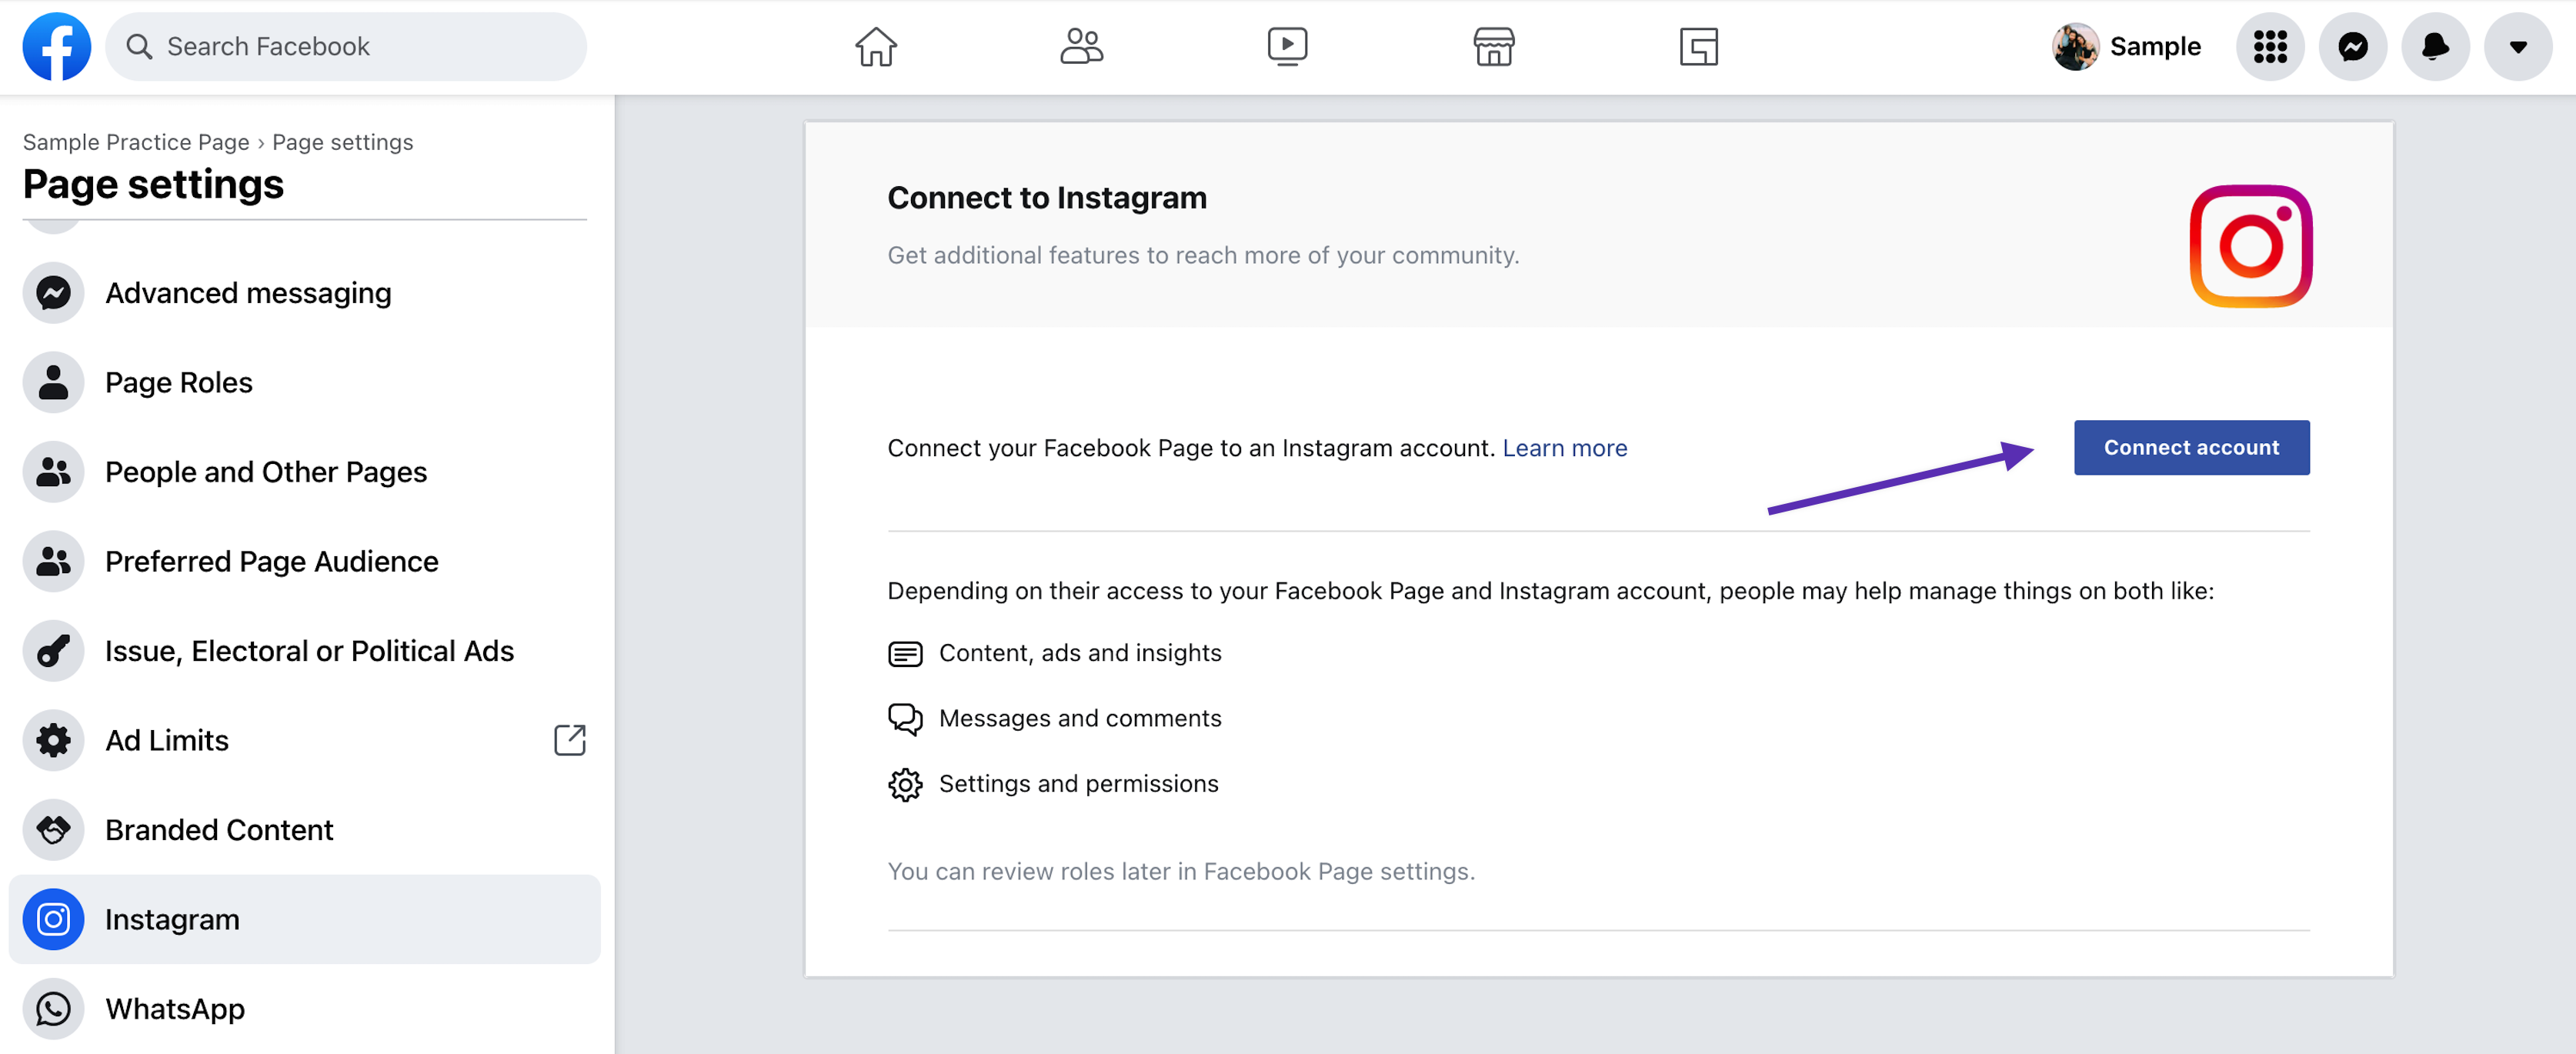
- Sign in to your Facebook account.
- Select Pages on the left, and then select the Page.
- Select Settings at the bottom of the Manage Page menu on the left.
- Select Instagram from the Page Settings menu.
- Click Connect account button and enter your Instagram account credentials (username and password) and then select Log In.
- Go to your website’s dashboard, click on Get Social, and then on the Settings tab. Follow the prompts to connect your business Instagram account.
👉 Learn more on Facebook > “How do I connect my Facebook Page and Instagram account?”.
How to create a business Instagram account
These steps are easiest to do on a desktop or laptop computer.
- You first have to create your Instagram account as a personal account. Create your personal Instagram account here.
- After you have created your personal account, you will need to switch it over to a business account by following these steps.
- After you switched to a business account, you will need to connect your Instagram account to your business Facebook page. Follow the steps in section above “How to connect your Facebook and Instagram pages”
Once connected, you typically only have to “reconnect” to your social networks if you change your password.

*If you’re connected to both social networks, you’ll see both social network logos in green and (2) checkmarks next to Connected.
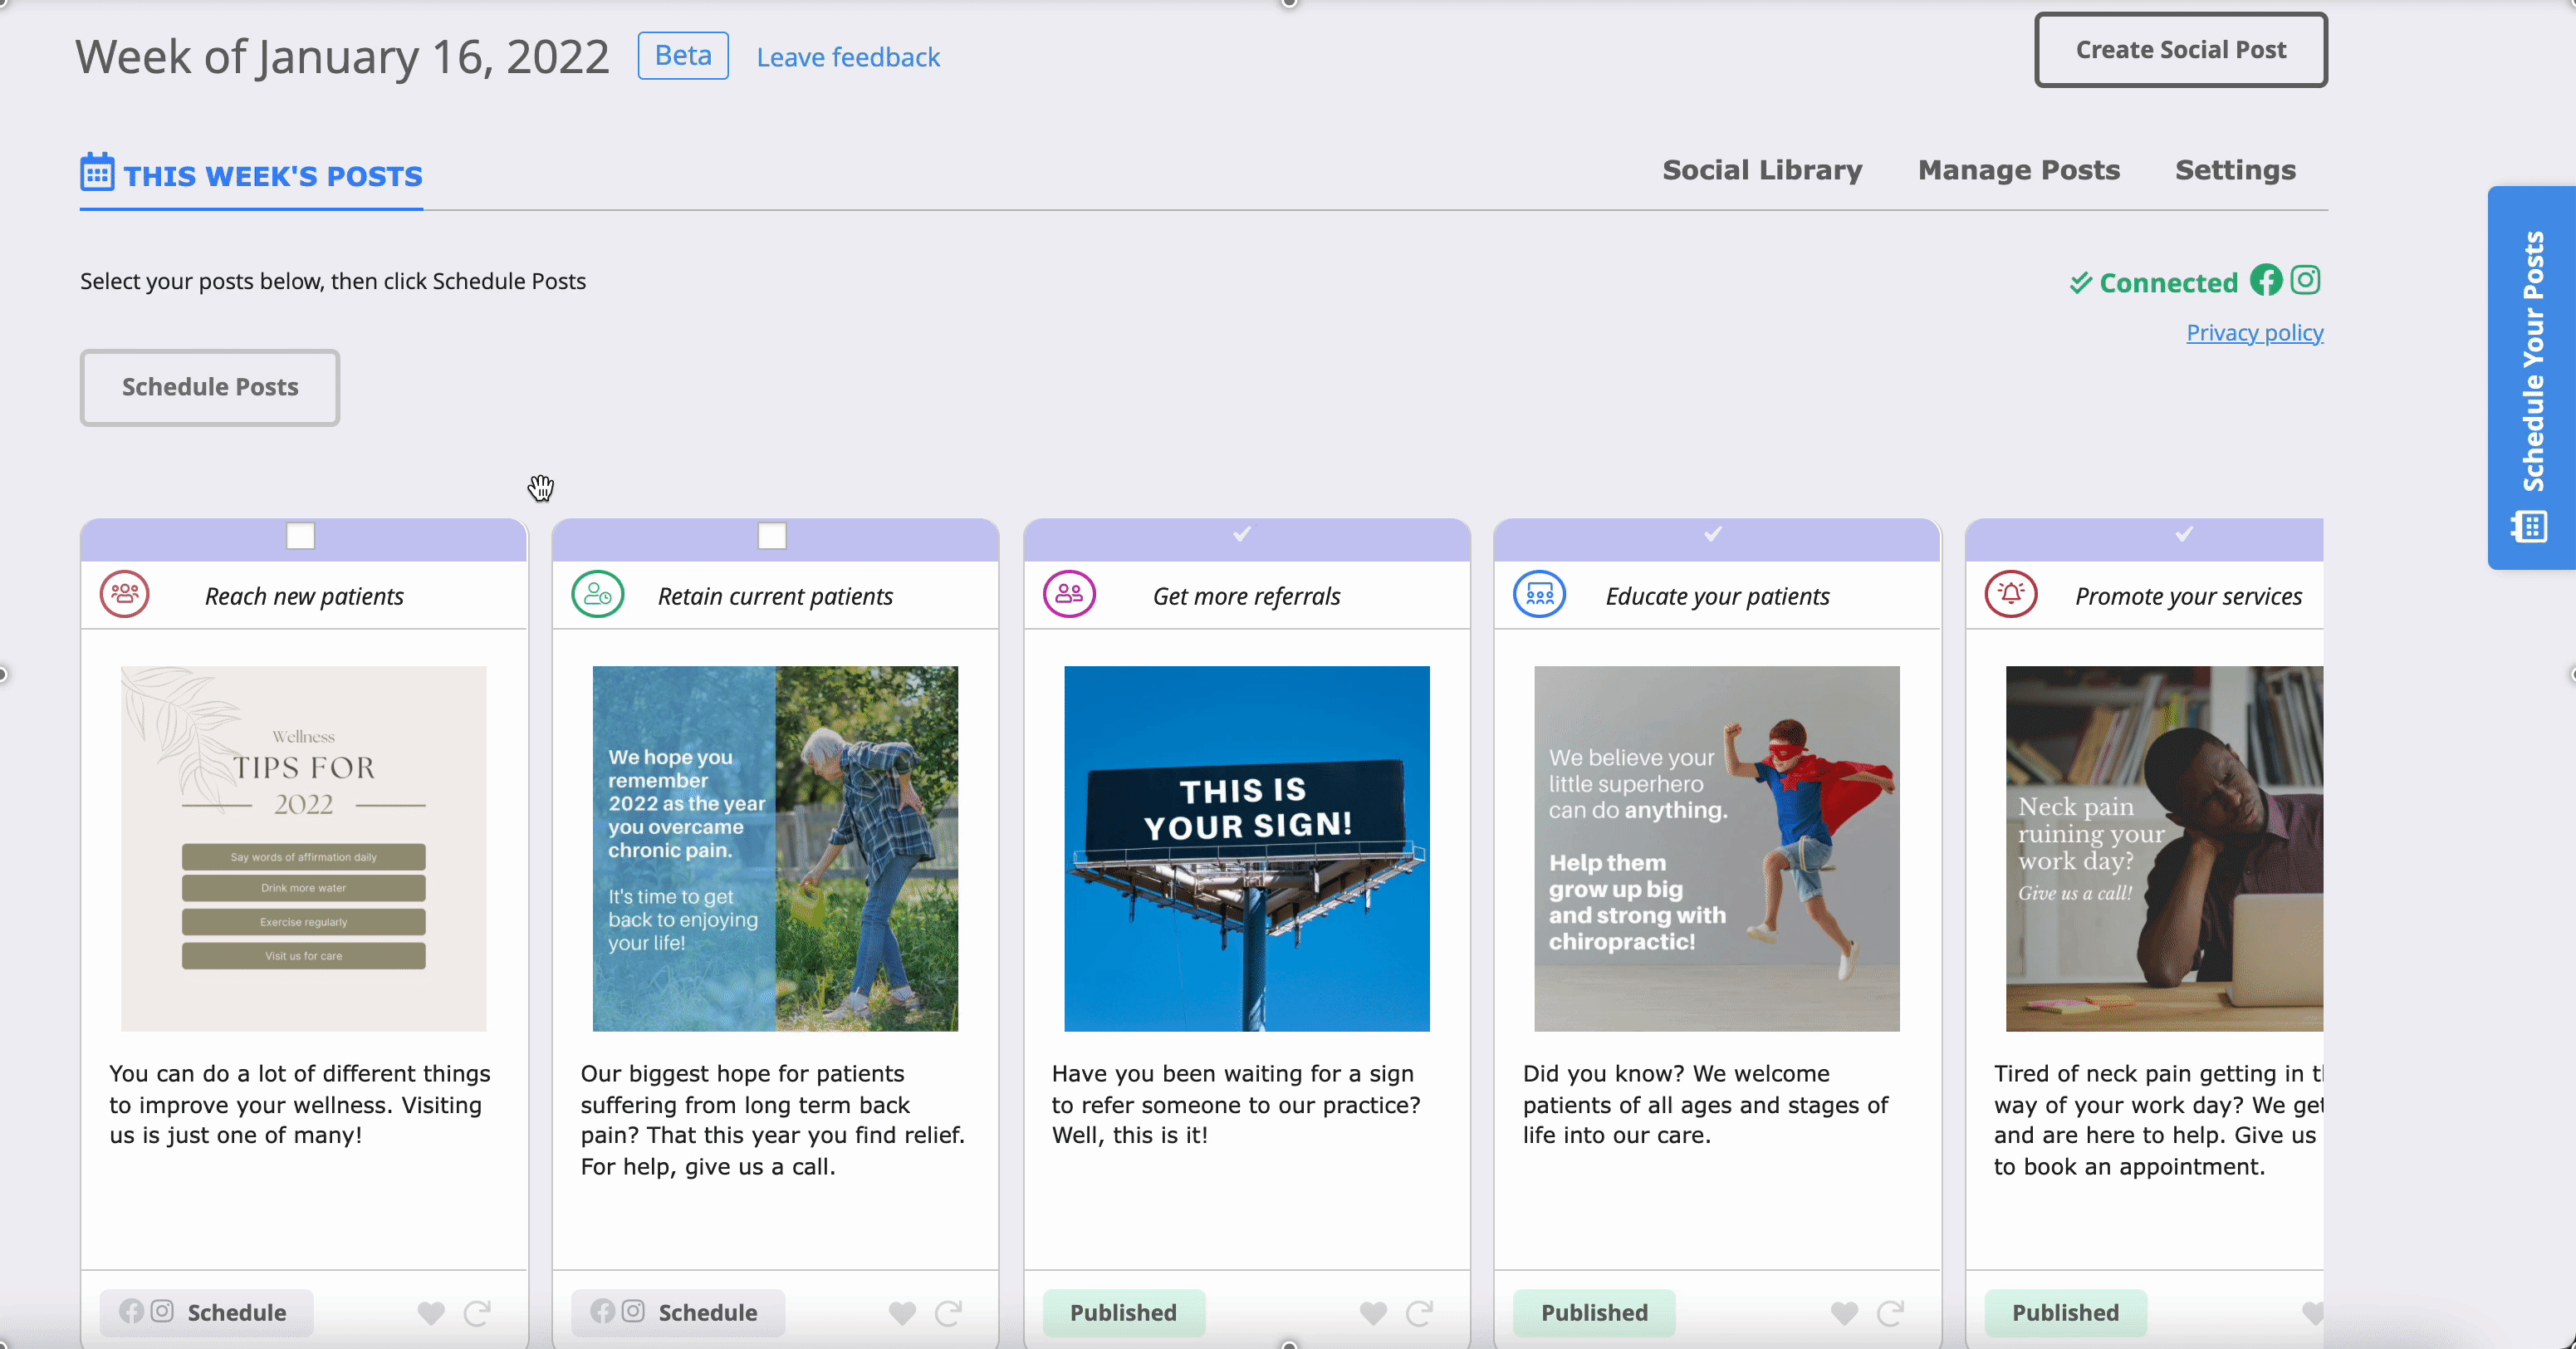
Now that you’re connected, review this weeks social graphics and start scheduling!
![]()
Step 2: Select & Schedule Your Social Graphics
Every week, new social graphics will be added to your social console to select, schedule and post to your Facebook page. Our social graphics are categorized into topics that focus on helping you grow your practice! Categories include:
- Reach New Patients
- Retain Patients
- Get Referrals
- Educate patients
- Generate Reviews
- Promote your services
- …and more!
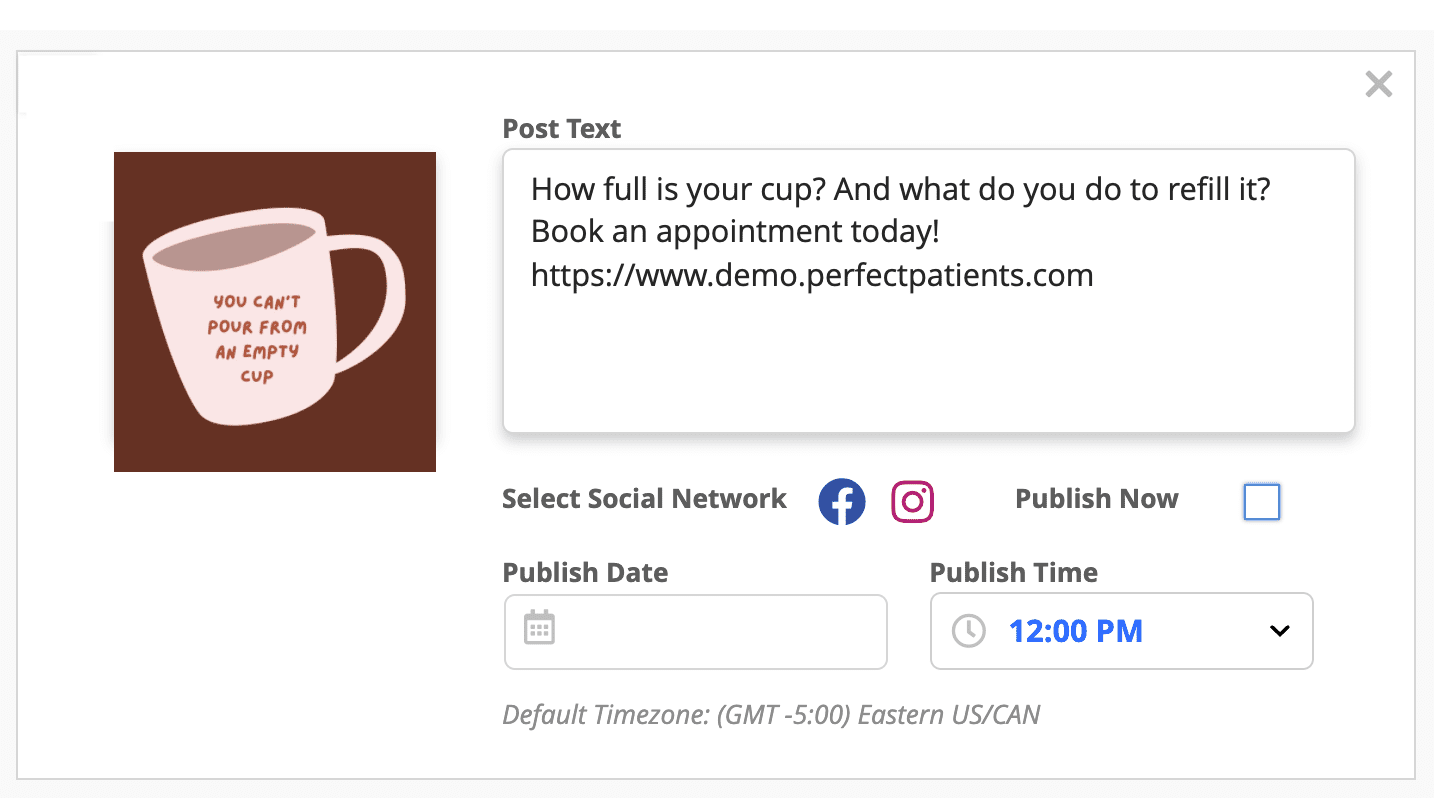
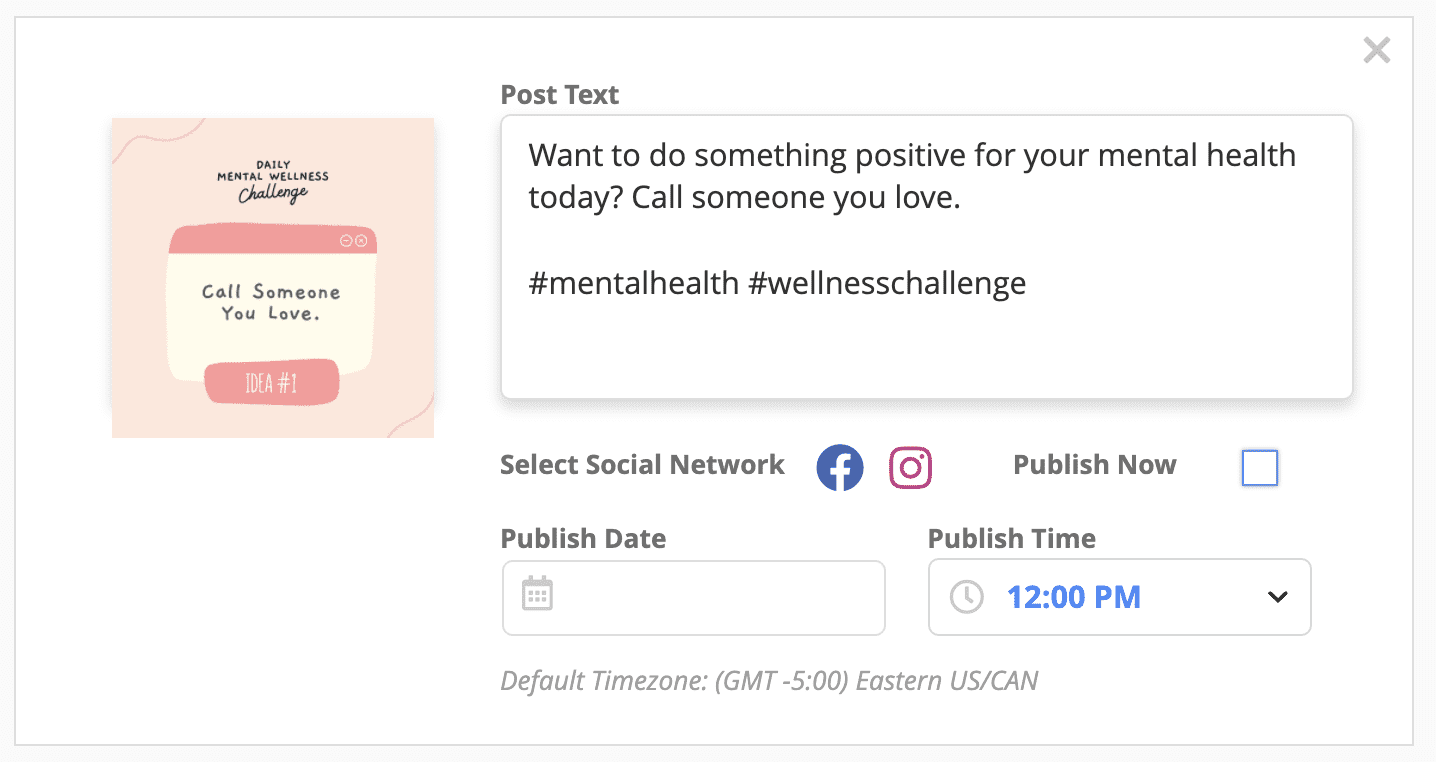
Select multiple graphics you’d like to schedule by clicking the checkbox at the top of each card, then click the green “Schedule Posts” button or simply click the “schedule” button on each card. The posts will be added to the scheduling drawer.
Once you’ve added your social graphics to the scheduler and customized the text as needed, it’s time to schedule the posting days and times. (If you’re connected to both Facebook and Instagram, you’ll have an option to select which network to post to, or publish to both!) Select a publish date from the calendar, and the time you’d like the post to go live, then click “Schedule Posts.”
Voilà! Quick and easy, right?!
Options
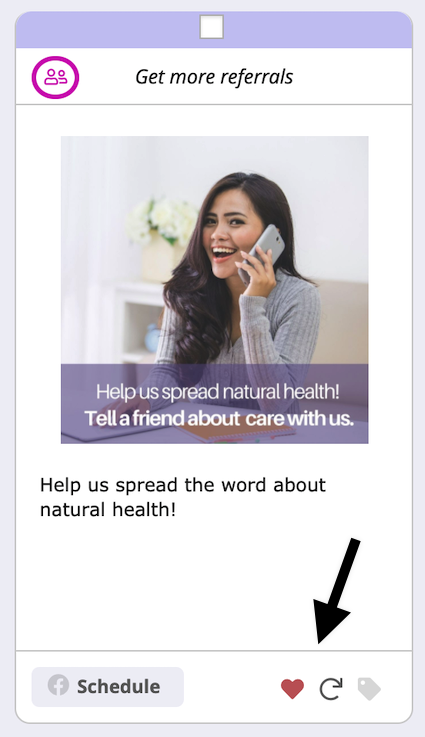
Refresh for new post – If you don’t like one of the weekly posts, click the “refresh arrow” on the bottom of the card and a new option will show in its place, or search and choose from hundreds of graphics in our social library! Simply click on “Social Library” in the upper right corner of your social dashboard.
Upload your own – You also have the option to upload your own graphics to create your own posts! Click “Create Social Post” or click on “Create and schedule another post” from the social scheduling drawer.
Favorite a post – Love one of the posts but want to save it to use later? Click the “heart” icon on the card to add it to your favorites. You can find your favorites gallery by clicking the “Social Library” button and then “Favorites”.
![]()
Manage Posts
If you need to edit or delete a post that’s been scheduled, simply click on “Manage Posts” and then click on edit or delete from the Actions menu. The edit (pencil icon) will only show for posts that are “Scheduled.”

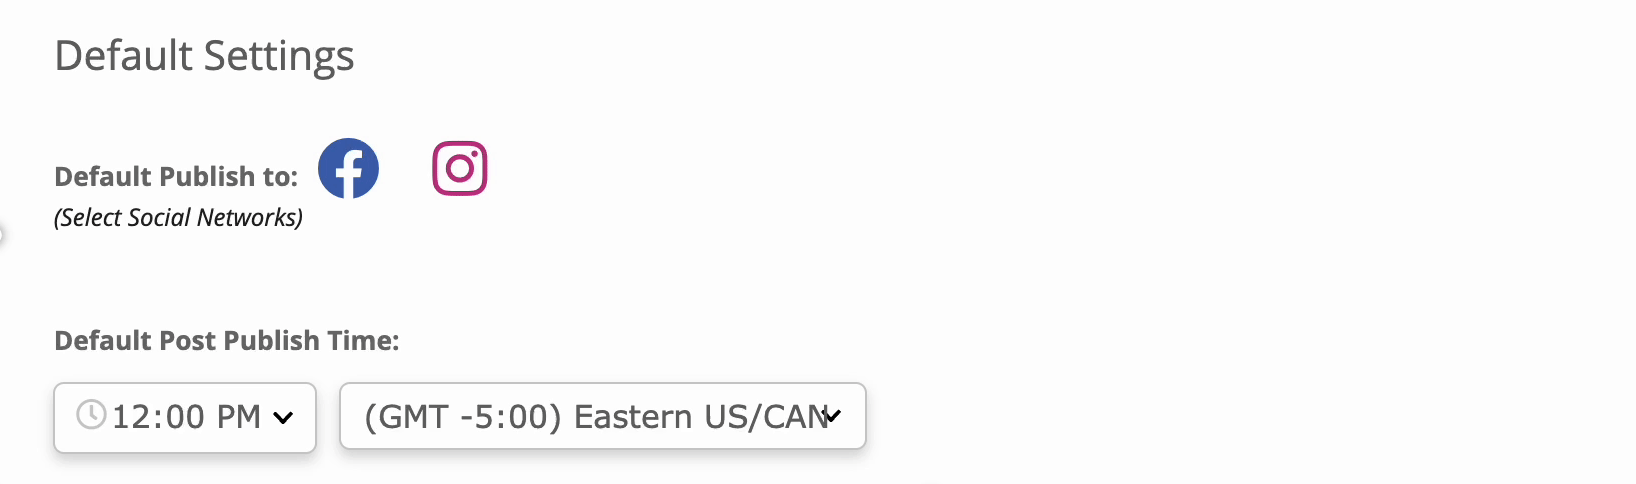
Settings – Save some clicks by customizing your default settings!
Want to set a default publish time? Go to Settings, update your “Default Post Publish Time” and click the “Save” button.
Do you mostly want to post to Facebook AND Instagram?
If you’re connected to both, to save you some clicks when scheduling, we’ve set the default setting to post to both social networks. You can disable this in Settings, by de-selecting the social networks or choosing your preference.
Don’t forget to click “Save.”
👉 Remember to check your page notifications throughout the week to make sure that any questions or comments are responded to in a timely manner. Enjoy and please let us know if you need any help. Click the “Share feedback” link on the social dashboard or on “Request Support.”
FAQs
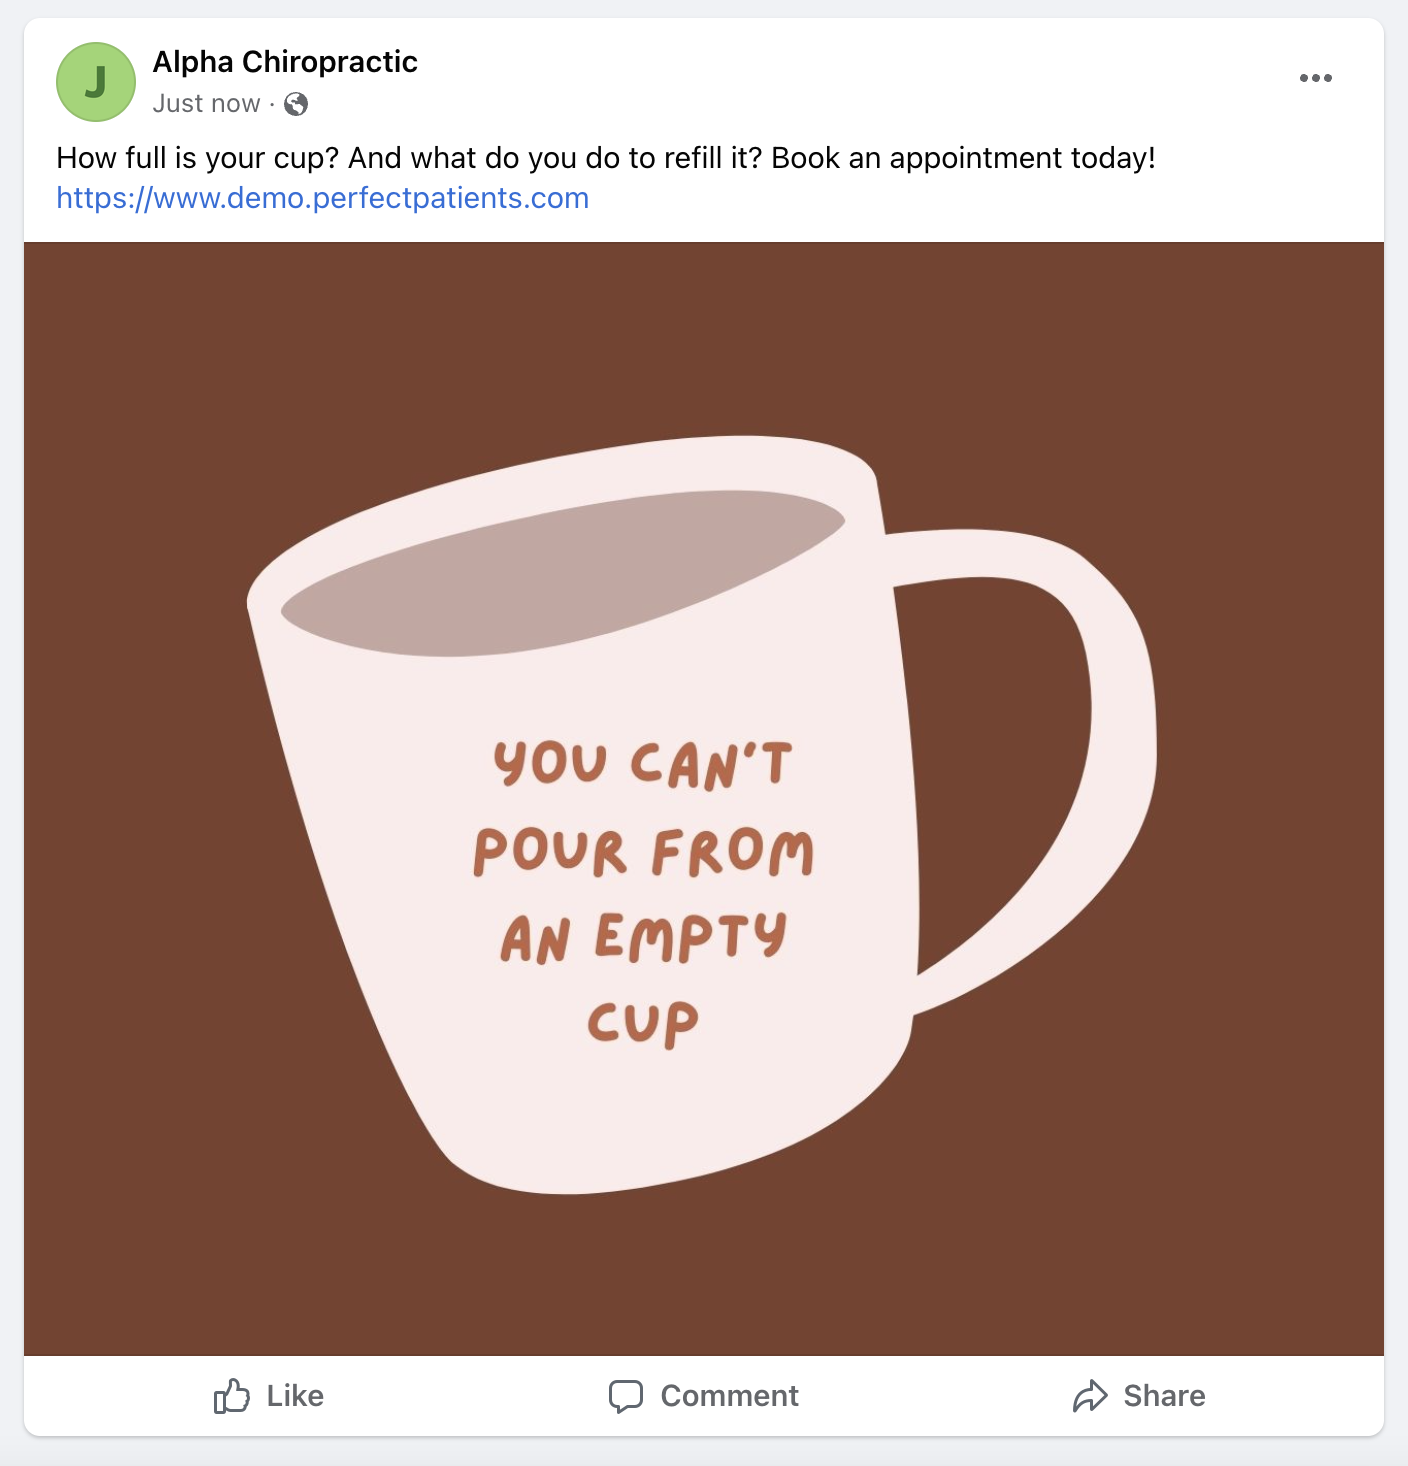
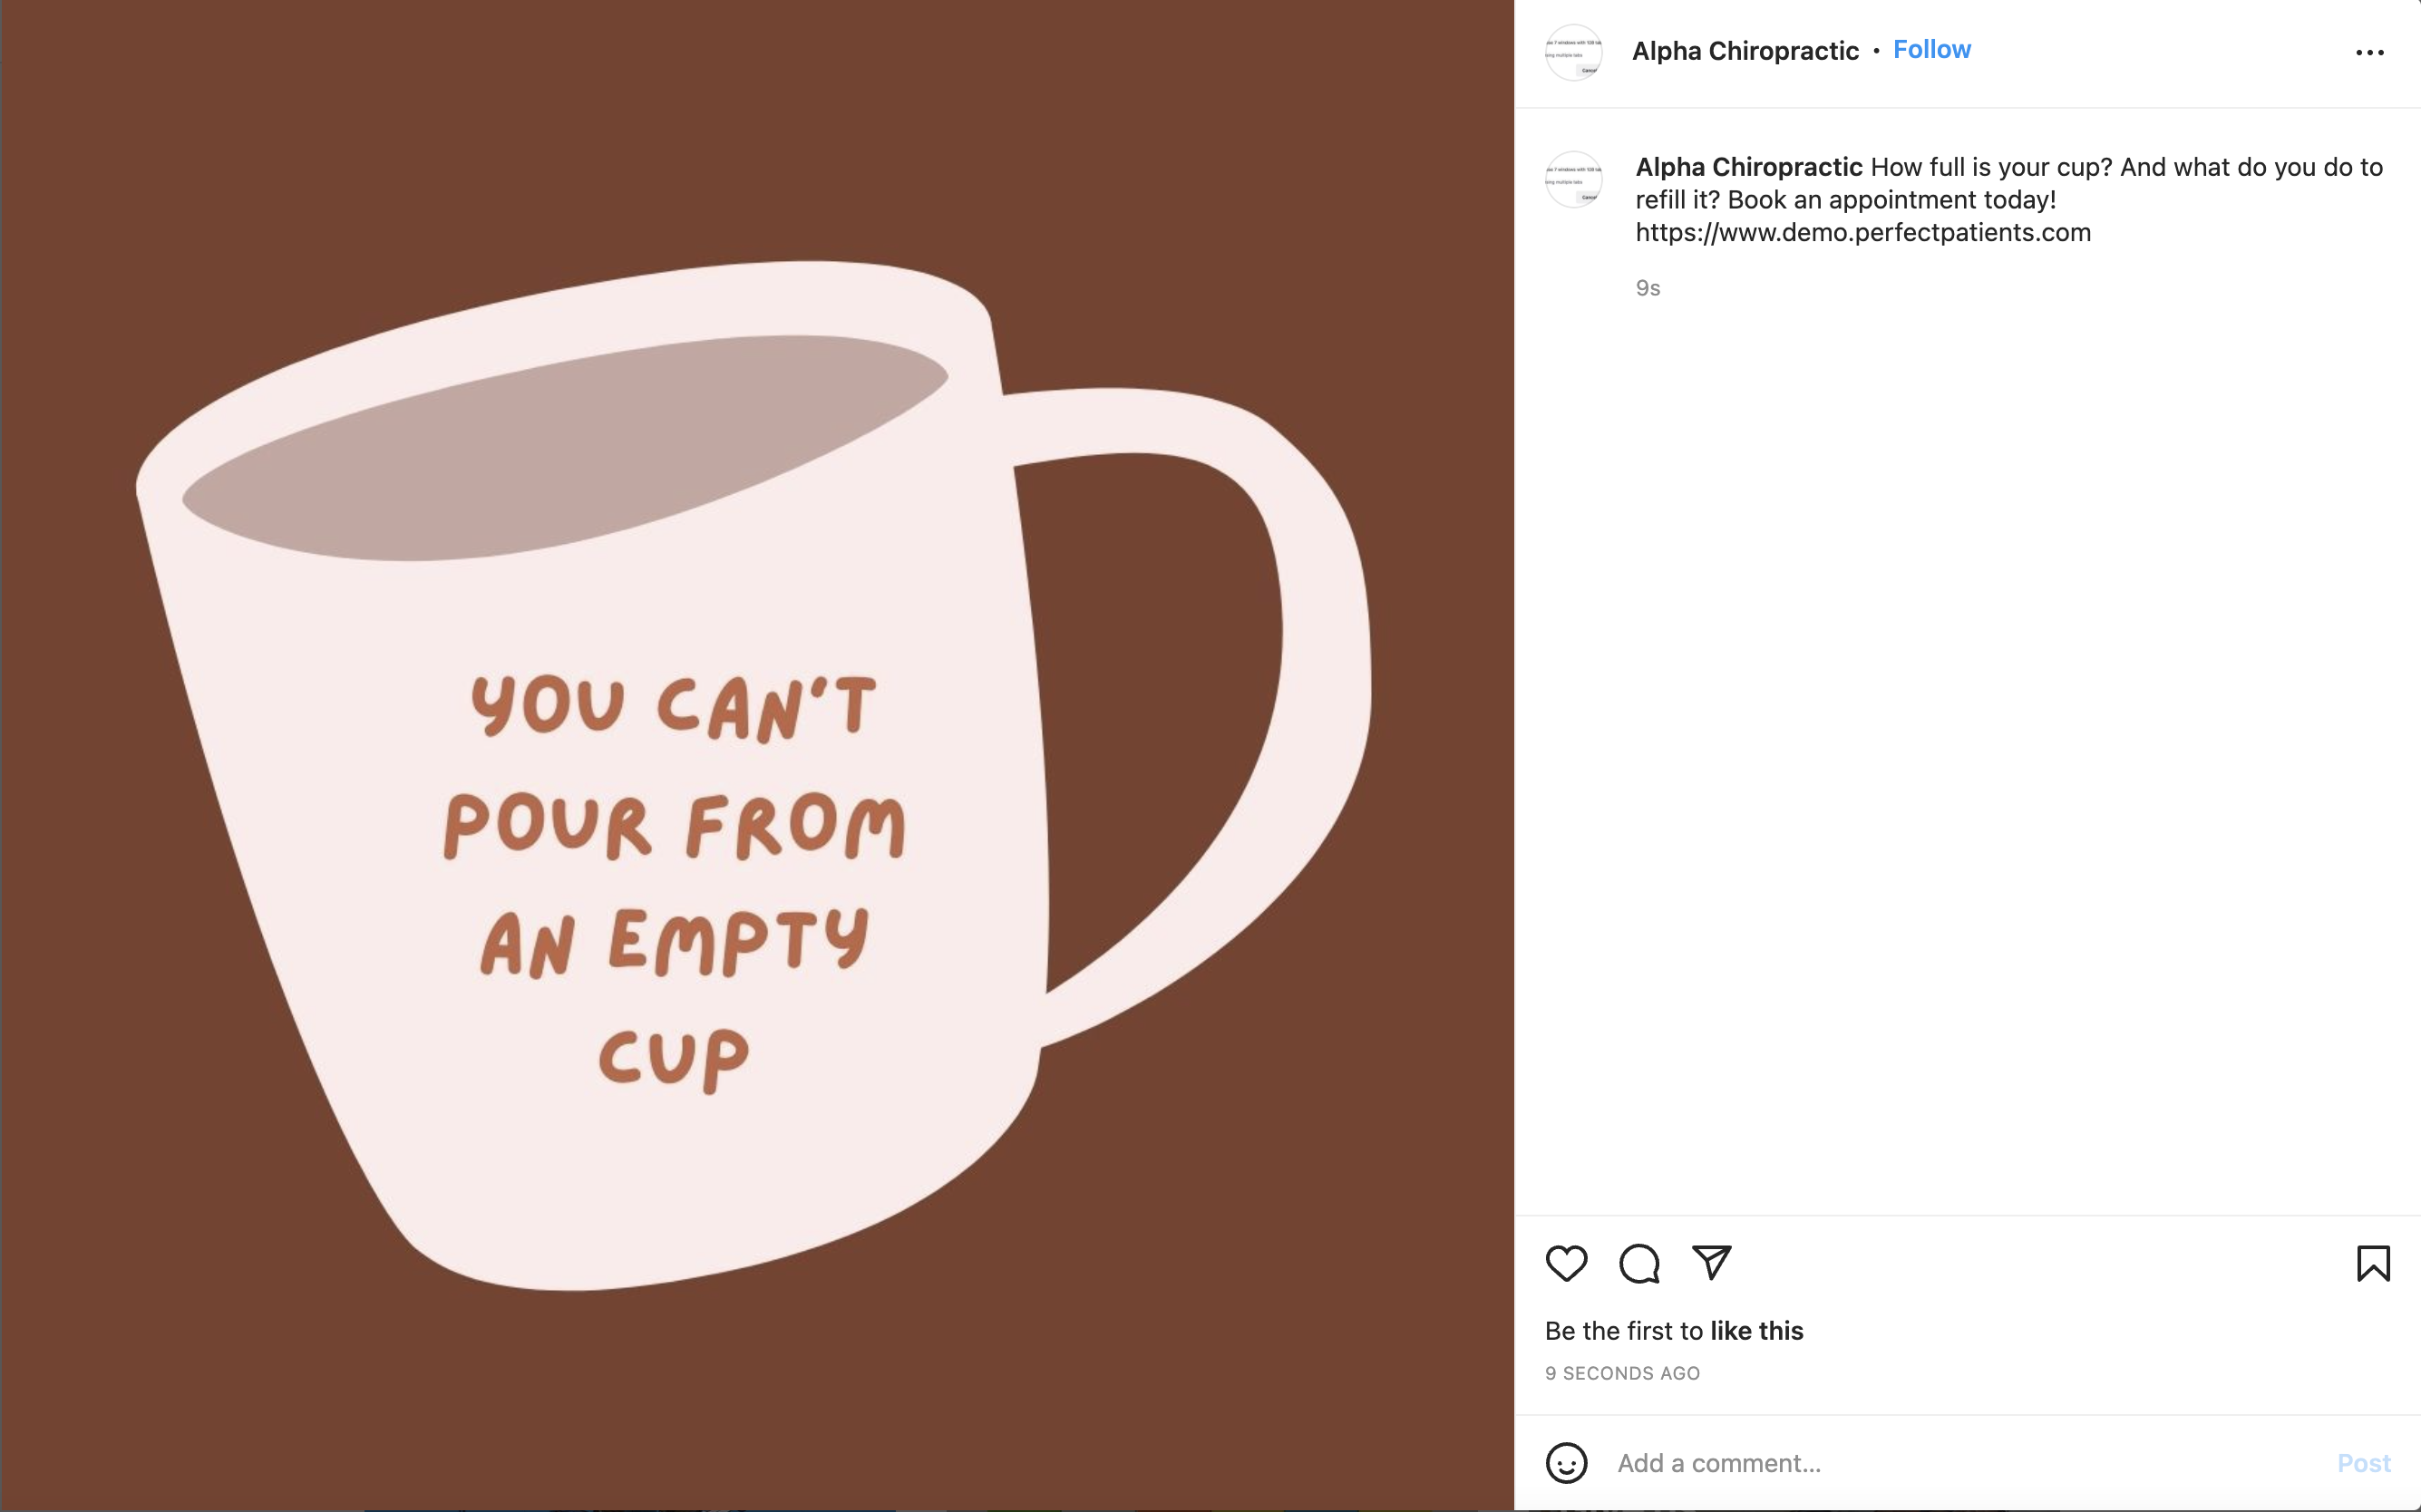
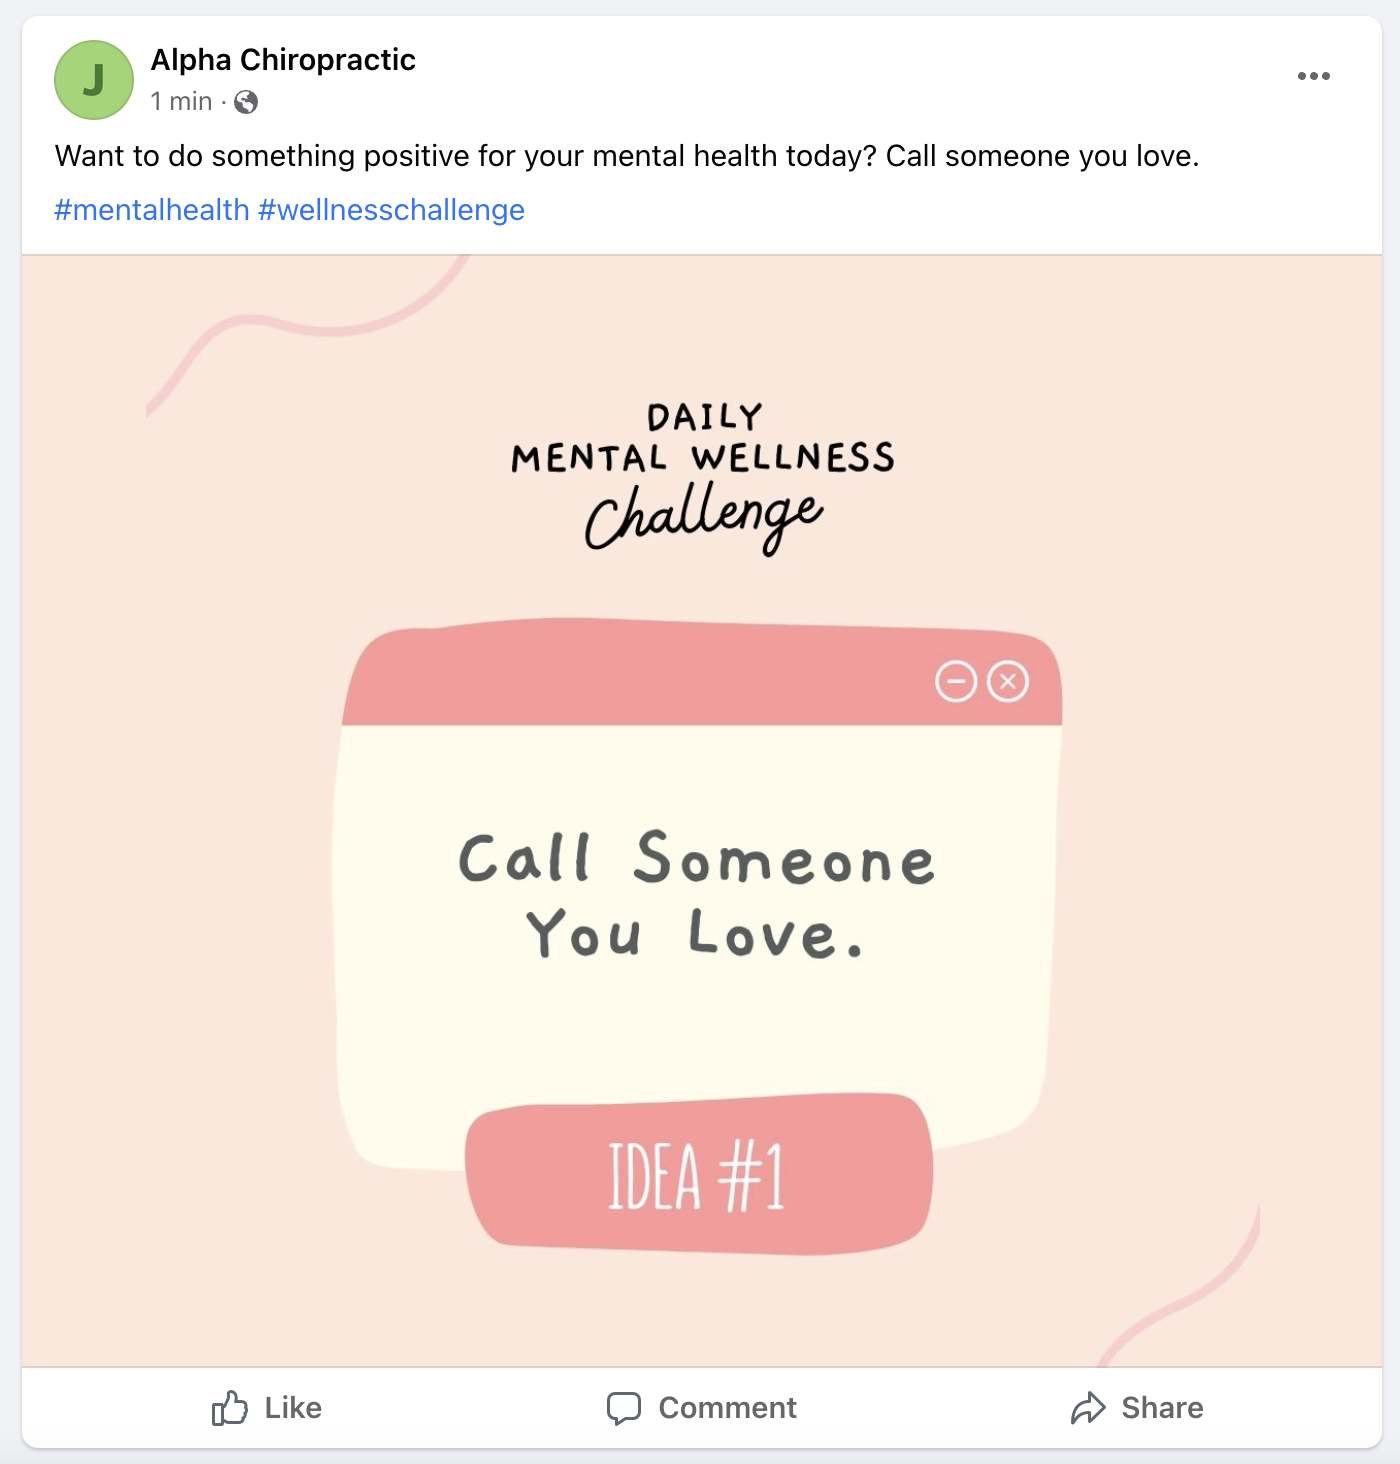
How do I post a link to a website page?Simply copy and paste the URL into the Post Text field with your other content. It will automatically show as a clickable link on Facebook. Instagram doesn’t support hyperlinks in content, from any source, therefore it will show as a plain text.
See example and results on Facebook and Instagram below.
Facebook Results
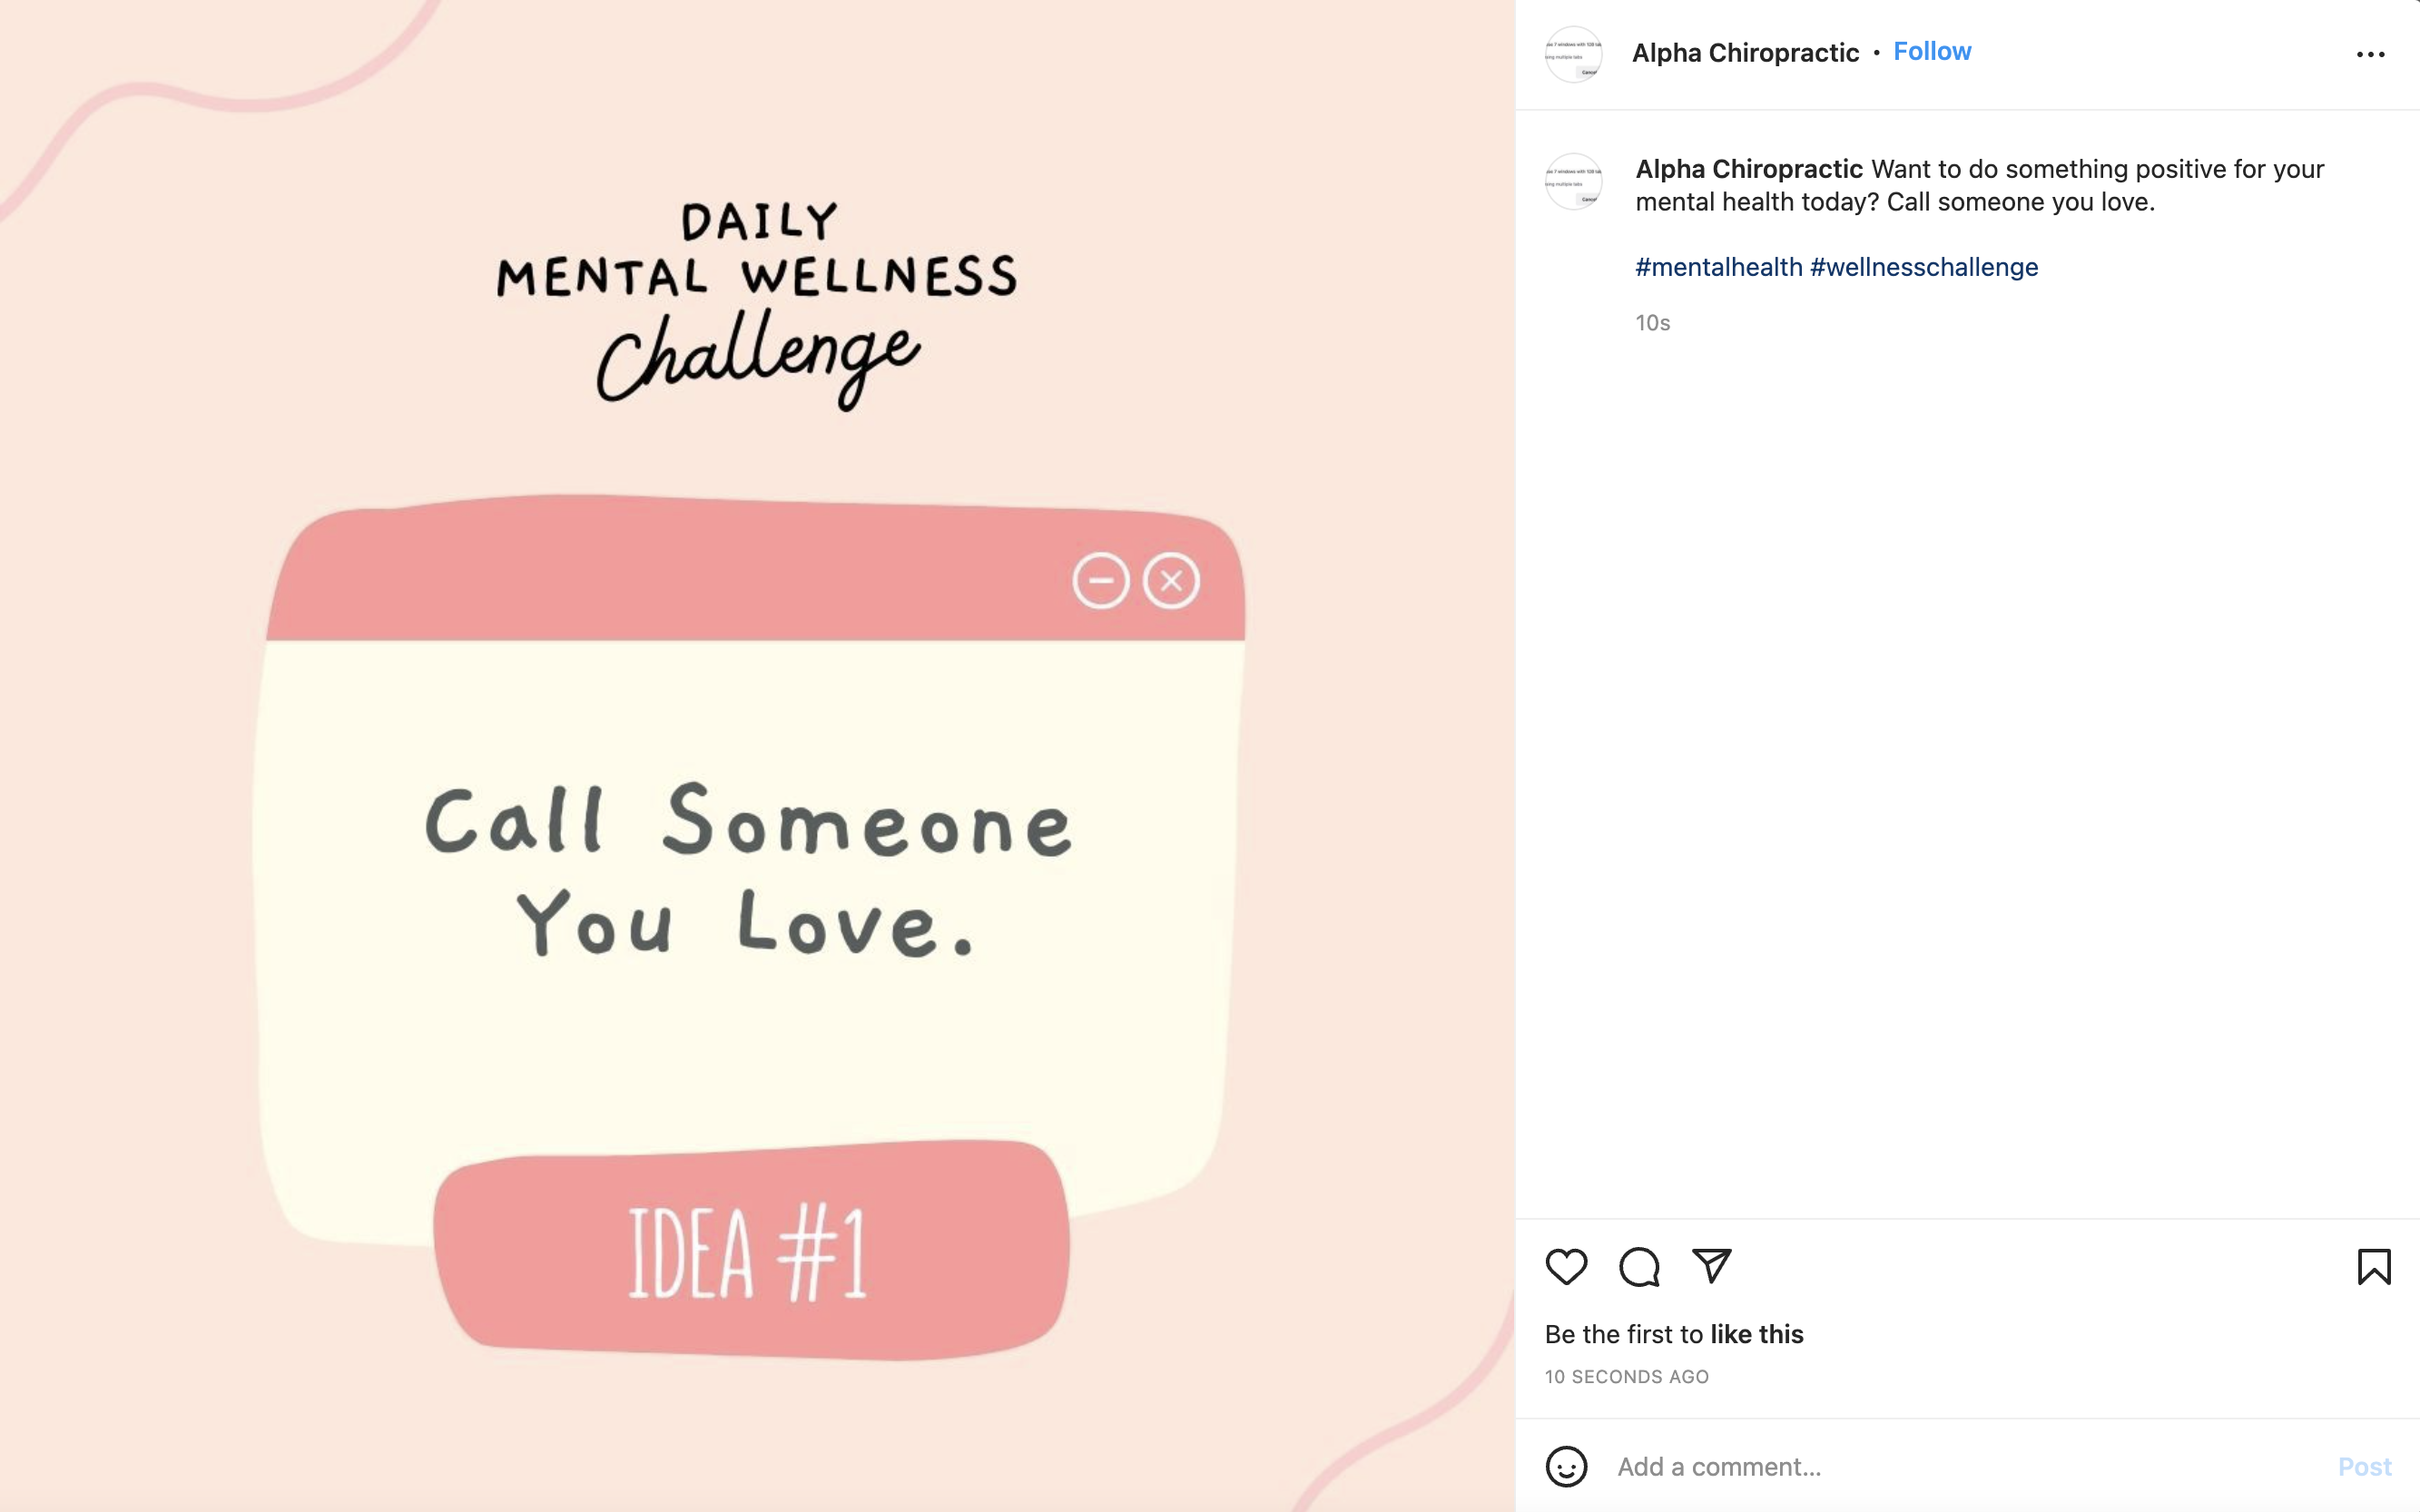
Instagram Results
Click to view larger
Simply add your hashtag into the Post Text field with your other content. It will automatically show as a clickable hashtag on Facebook and Instagram. See example and results on Facebook and Instagram below.
Facebook Results
Instagram Results
Click to view larger
No, there are no limitations set. Post away!
You’ll need to edit or delete it on Facebook and/or Instagram if it’s already been posted.
Coming Soon!
- Insights to see your most popular posts and how your audience is engaging